Grant's Back Yard Build

Guitars by Grant Goltz of Hackensack, MN
User avatar
coopman
Posts: 843
Joined: Mon Aug 25, 2008 8:47 am
Include Off Topic: Yes
Location: The Fingerlakes NY
Contact:

Re: Grant's Back Yard Build

Post by coopman » Sun Sep 12, 2010 3:00 pm

Hey Grant!

Well after 2 yrs ... I'm back! I give an update as to what I've been up to. But in the meantime ... I just had to comment on your book matched black locust fingerboard/headstock. That looks sooo cool ... I would never think of using that stuff, but it makes sense. Speaking of back yard we have 1000's of board feet of black locust growing nearby. Anyone what any? It's free for the taking ... come and get it :) It's officially a weed and frankly we consider it an invasive species. The roots grow like a giant spider web just down a foot or so.... all over. It's actually used as an erosion control "plant" because of it fast growing nature. If we let our lawn grow for more than 2 weeks or so we'll have hundreds of little baby locust's growing everywhere ... even though the nearest mother trees are hundreds of feet away now. If times get [really] tough I guess my yard builds will be black locust specials. Not too sure on the tone ... but they'll be indestructible. :mrgreen: :mrgreen:

The rest of the build and wood combination's are very interesting thanks for reconstructing this post.

John
John Cooper

"Hard pressed on the right. Center is falling. No possibility to maneuver. Situation excellent. I am attacking." - Gen. Ferdinand

User avatar
whitespruce
Site Admin
Posts: 4367
Joined: Thu Aug 21, 2008 6:53 am
Include Off Topic: Yes
Location: Northern Minnesota, USA

Re: Grant's Back Yard Build

Post by whitespruce » Sun Sep 12, 2010 4:18 pm

Thanks for the comments, John, and welcome back. Looking forward to seeing what you have been up to.

Ya, that black locust does creep around. We planted one tree many years ago in our old reclaimed gravel pit and they are popping up all over. What saves us up north here is that they get about 5" in diameter and then die. But the roots keep sending up new ones. Does get nice fragrant blossoms in the Spring, though.

G

User avatar
Dennis Leahy
Dishwasher
Posts: 7082
Joined: Thu Aug 21, 2008 1:59 am
Include Off Topic: Yes
Location: looking for a place to live

Re: Grant's Back Yard Build

Post by Dennis Leahy » Sun Sep 12, 2010 5:23 pm

Gonna look like it was bound in metallic bronze! You'll have to get this into a tent at one of Padma's art shows. (I think) that he paints some of his work in fluorescent paint and shows them under black light.

John Cooper! Whoa, need a new post for that!

Dennis
Dennis Leahy

User avatar
whitespruce
Site Admin
Posts: 4367
Joined: Thu Aug 21, 2008 6:53 am
Include Off Topic: Yes
Location: Northern Minnesota, USA

Re: Grant's Back Yard Build

Post by whitespruce » Sun Sep 12, 2010 9:58 pm

Well, I thought I had more old photos, but could not find them, so I will just start with what I have.

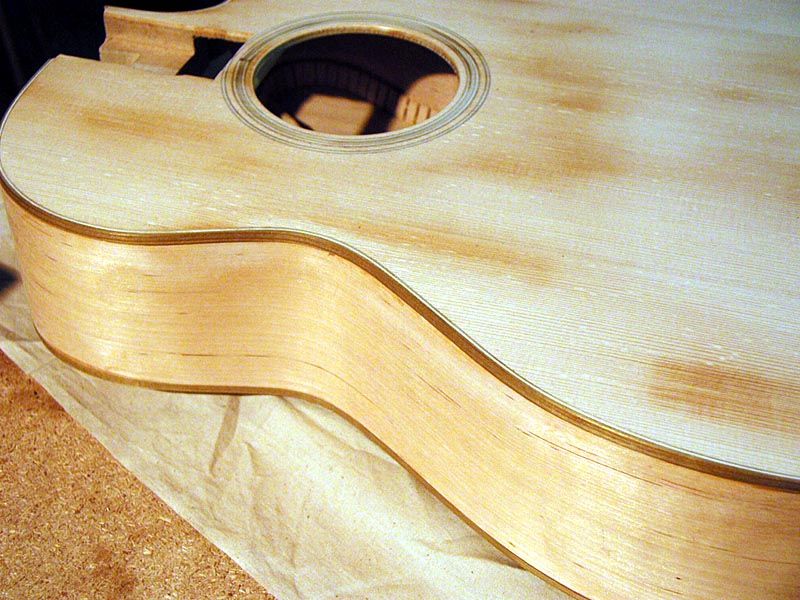
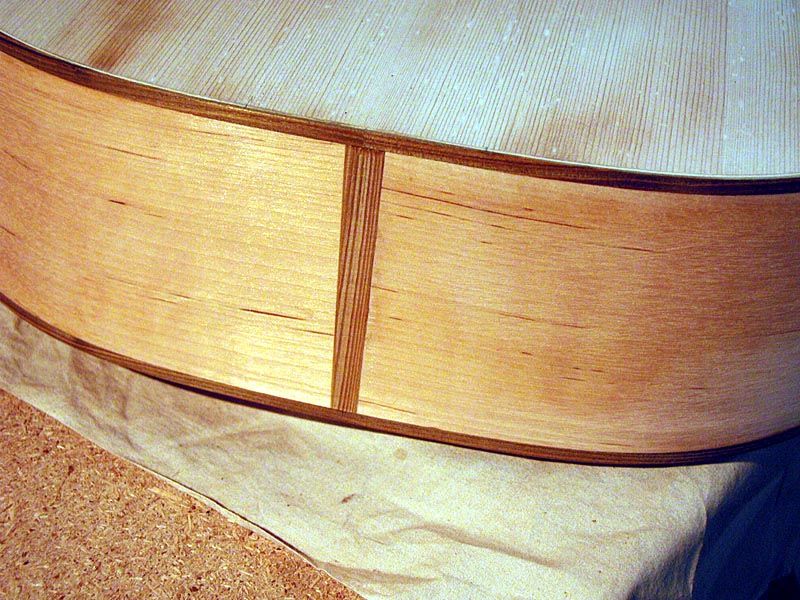
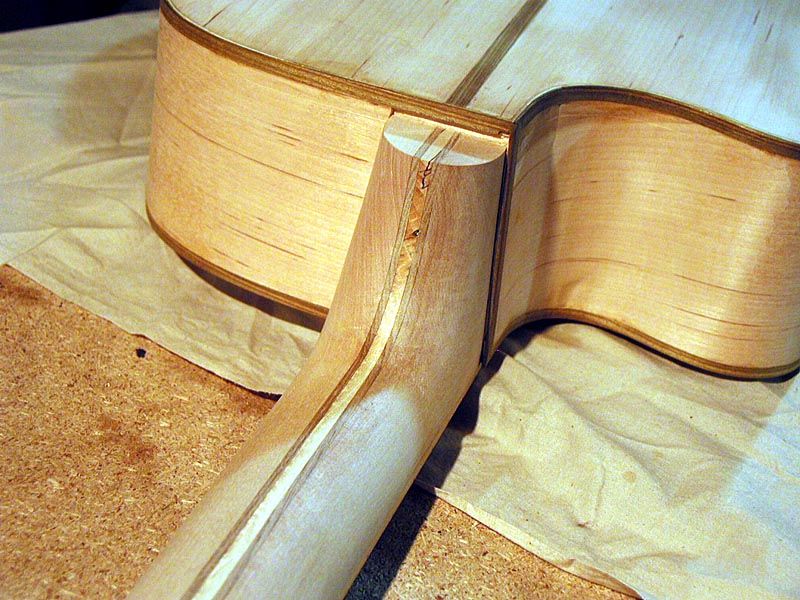
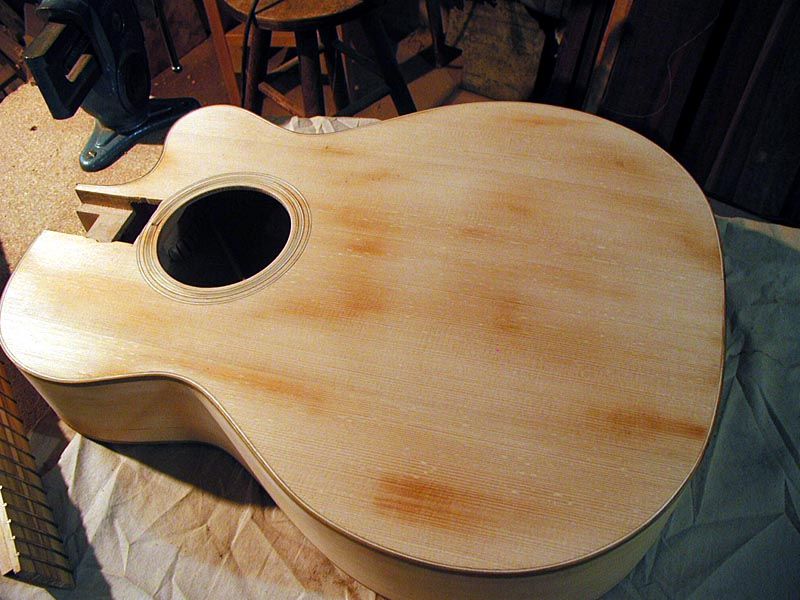
In the "no photo department", I glued the purflings as a separate step, then glued the bindings. Just my basic Elmer's wood glue and blue tape method. Then I leveled the bindings to the top and back and then to the sides. Just used scrapers and sanding. Here are three views of the results:
Image
Image
Image
The top looks splotchy because I gave it a coat of shellac and there are spots where it is not totally sanded off yet. BTW, the sumac bindings will flouresce blue-green under a blacklight, hence Dennis' comment :mrgreen:

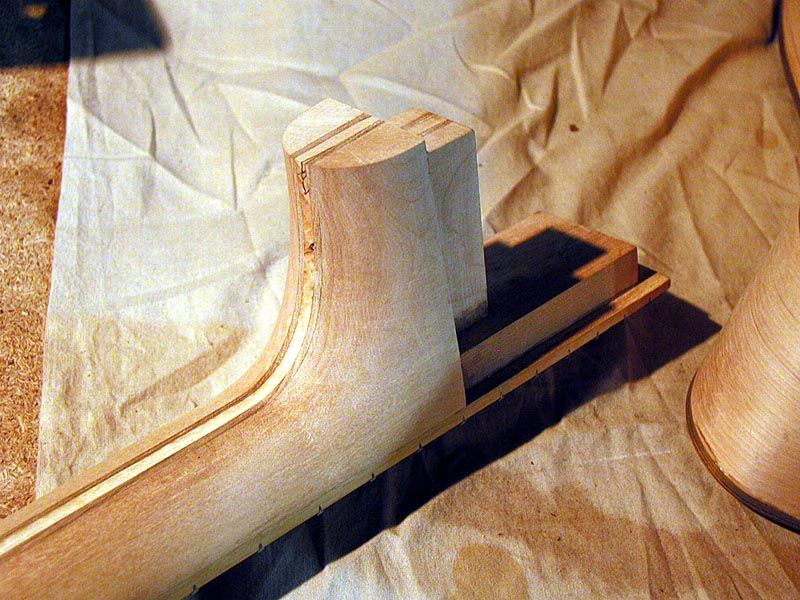
Next step was to final shape the neck heel and sand. Looks like this, now
Image
Still needs a heel cap

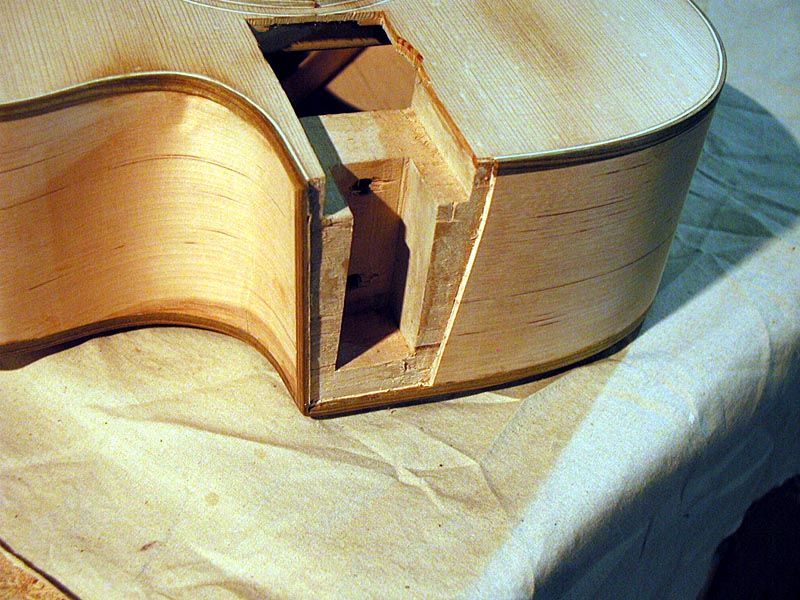
Now, I have started the process of fitting the neck to the body. With my adjustable neck, the neck heel is inlet through the sides, so the first step is to bolt the neck on firmly and scribe the sides following the outline of the heel. For this I just use a utility knife with a new blade. Then I remove the neck and deepen the cuts until they are through the thickness of the sides. Then I just chisel out the side wood inside the cuts. Quite simple, and it looks like this.
Image

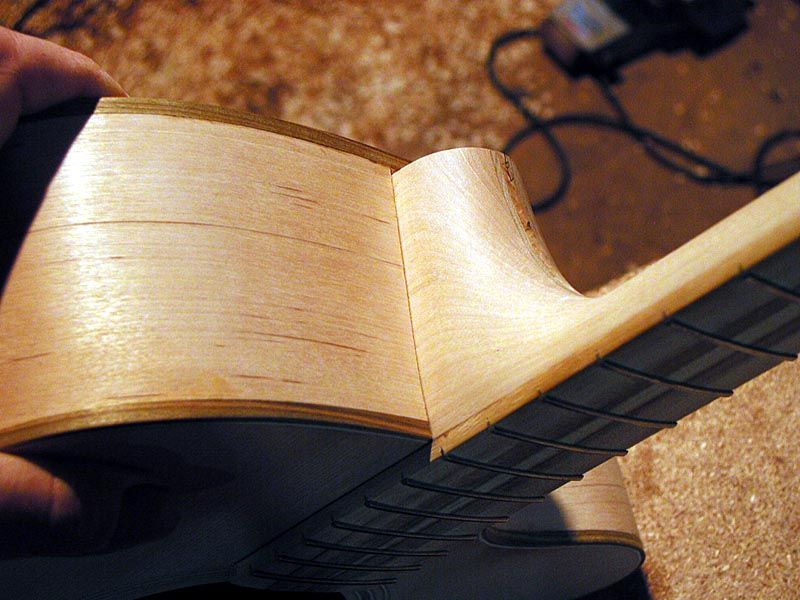
The neck now fits snugly in and looks like this
Image
Image

Next, I have to taper the depth of the bottom of the "pocket" and the lower part of the end of the neck tenon to allow for adjustability. I will show that on the next post.

G

User avatar
Joe Sustaire
Moderator
Posts: 2640
Joined: Sat Aug 23, 2008 6:41 pm
Include Off Topic: Yes
Location: Talihina, Oklahoma

Re: Grant's Back Yard Build

Post by Joe Sustaire » Mon Sep 13, 2010 8:03 am

That is really looking sharp Grant!

I can't see where you say what the back and sides are, is it birch? It has the markings like the birchbark you build your canoes out of. I really like the looks of it! I want some!

Sumac binding is sharp also.

Joe
"I tell you we are here on earth to fart around, and don't let anyone tell you any different!"
Kurt Vonnegut

User avatar
whitespruce
Site Admin
Posts: 4367
Joined: Thu Aug 21, 2008 6:53 am
Include Off Topic: Yes
Location: Northern Minnesota, USA

Re: Grant's Back Yard Build

Post by whitespruce » Sat Jul 16, 2011 8:07 am

Well, I want to get this playable for the Stringfest, so it will get some "spit coats" of French polish between now and then. I am planning to do the final assembly and setup at the Stringfest as a demonstration. That demo will probably start with vacuum gluing of the bridge.

G

User avatar
whitespruce
Site Admin
Posts: 4367
Joined: Thu Aug 21, 2008 6:53 am
Include Off Topic: Yes
Location: Northern Minnesota, USA

Re: Grant's Back Yard Build

Post by whitespruce » Tue Jul 19, 2011 8:30 am

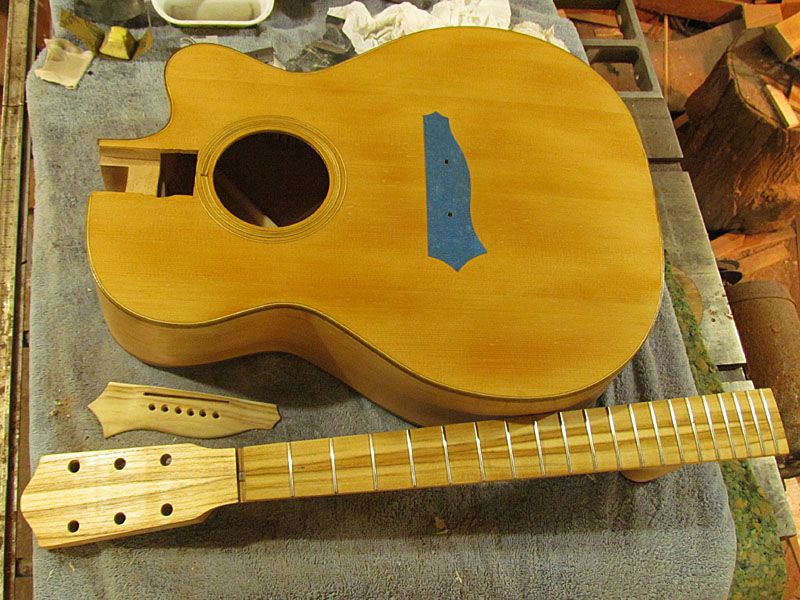
OK, some photos of where this one is at.

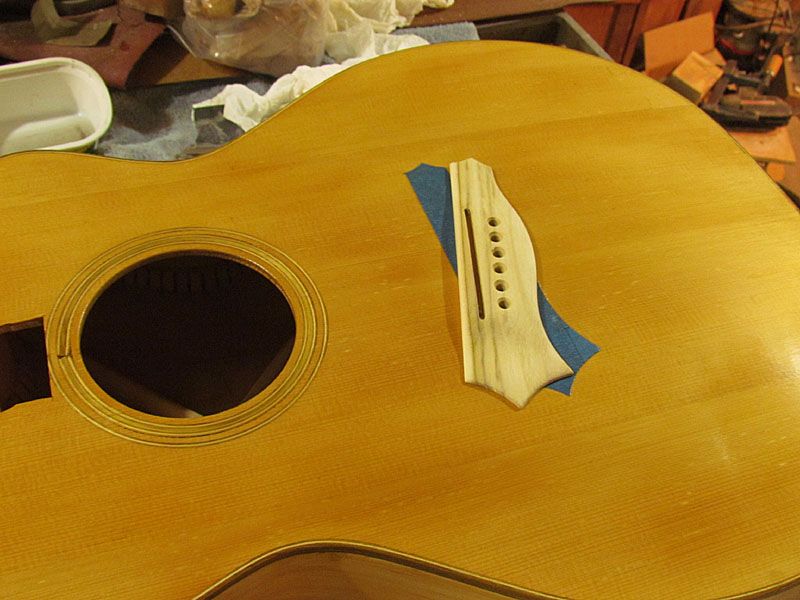
The top, neck, and bridge
Image
I will get a few more coats of French polish on the top so it has all it needs, so I will be able to glue on the bridge Friday afternoon at the Stringfest

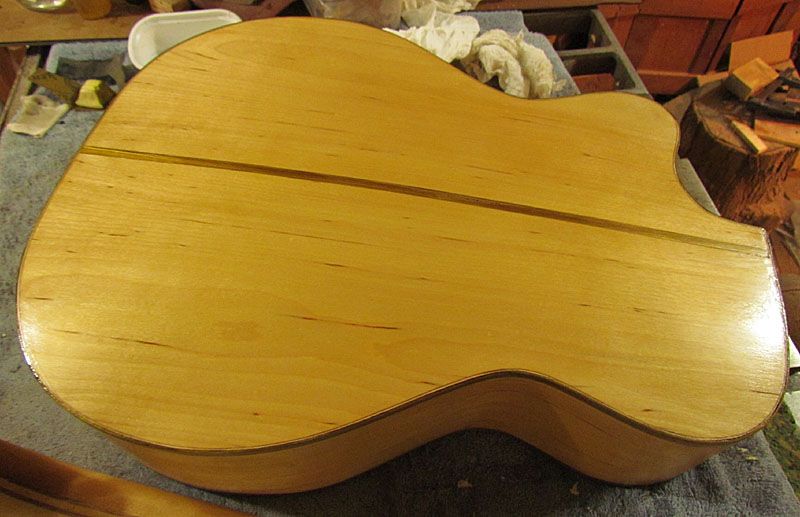
Here is the back
Image
Just a few spit coats for now because I can always do more later

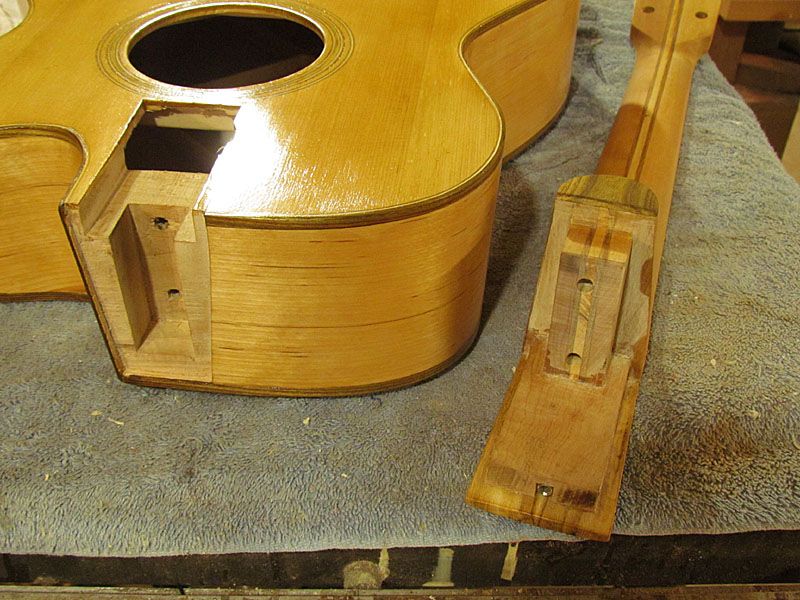
The neck tenon and mortise pocket ready to go
Image
Look close and compare to photos on previous posts and you can see that I have tapered the depth of the sides of the pocket. And, ya, I gotta fix that little corner of the back binding below the neck heel :oops:

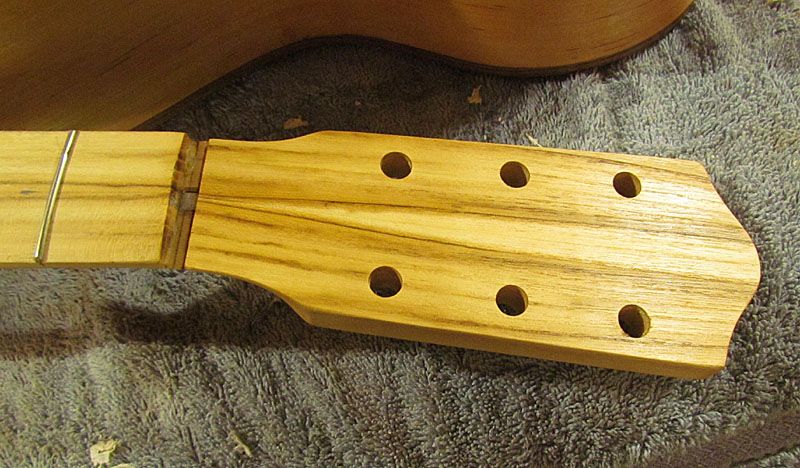
The peghead
Image
This will eventually get a few more coats of Tru-oil, but will do for now. I will instal the tuners before Friday

And here is what we do first thing Friday afternoon..glue this dude on
Image

I will get the nut and saddle roughed out so we can string this one up and do the setup Friday evening.

G

User avatar
penndan
Posts: 197
Joined: Sat Mar 20, 2010 6:42 am

Re: Grant's Back Yard Build

Post by penndan » Sun Aug 07, 2011 3:04 pm

Grant
The fingerboard extension block - is that inlet into the neck under the fingerboard or just butted to the neck heel and glued to the fingerbboard?
I'm trying to duplicate your adjustable system.
Dan
Dan Pennington
Minneapolis

Be sincere, whether you mean it or not.

Post Reply