Size 2 Martin build coming late October
- Dennis Mitchell
- Posts: 1912
- Joined: Wed Nov 26, 2008 5:59 pm
- Include Off Topic: Yes
- Location: Republic of Texas
- Contact:
Re: Size 2 Martin build coming late October
Like all the rest, thanks so much Grant! What a pleasure to watch and learn from a true craftsman. 

Dennis Mitchell
"Music is a moral law. It gives soul to the universe, wings to the mind, flight to the imagination, a charm to sadness, gaiety and life to everything. It is the essence of order and lends to all that is good and just and beautiful."
PLATO
"Music is a moral law. It gives soul to the universe, wings to the mind, flight to the imagination, a charm to sadness, gaiety and life to everything. It is the essence of order and lends to all that is good and just and beautiful."
PLATO
- whitespruce
- Site Admin
- Posts: 4367
- Joined: Thu Aug 21, 2008 6:53 am
- Include Off Topic: Yes
- Location: Northern Minnesota, USA
Re: Size 2 Martin build coming late October
Well, I have been playing hookey again on this one. I did change the blade in my small bandsaw, so I can cut out a bending form and get on with the sides. And the humidity is down good so I can brace the top and back. Just gotta clean off my bench so I can actually have a place to do it 
I did find a scrap of mahogany for the neck. Gonna do one of those V joint pegheads cuz that is what is on the original. Plenty of examples here with Waddy and Arnt's builds, so I lots to go by, Gonna do a dovetail neck, too cuz that is what is on the original. Man, all that and an X braced top, too Gonna set me back 10 years.
I will have some photos in a few days.
G
I did find a scrap of mahogany for the neck. Gonna do one of those V joint pegheads cuz that is what is on the original. Plenty of examples here with Waddy and Arnt's builds, so I lots to go by, Gonna do a dovetail neck, too cuz that is what is on the original. Man, all that and an X braced top, too
I will have some photos in a few days.
G
Re: Size 2 Martin build coming late October
Great build thanks Grant, will be following this one with much interest.
Cheers
Kim
If you always do what you've always done, you'll always get what you've always got.
Kim
If you always do what you've always done, you'll always get what you've always got.
- Matt Shumway
- Posts: 421
- Joined: Tue Aug 11, 2009 10:25 pm
- Include Off Topic: Yes
- Location: Potatoes
Re: Size 2 Martin build coming late October
When I see the title to this thread my mind reads "Steve Martin coming in October" 
---- <('-'<) <('-')> (^'-')> (^'-'^) <('-'^) (>'-'<) (^'-'<) <('-'^) (>'-'<) (>'-'^) ----
- whitespruce
- Site Admin
- Posts: 4367
- Joined: Thu Aug 21, 2008 6:53 am
- Include Off Topic: Yes
- Location: Northern Minnesota, USA
Re: Size 2 Martin build coming late October
Well I took some time while the shop was warming up today to work on the neck. As I mentioned, this will be a V joint peghead, just like the original 1890 Martin that I am replicating has.
One nice thing about this style of neck is that I can use shorter "scraps" of mahogany that are too small for a regular neck. Only needed a 16" long piece for the neck shaft.
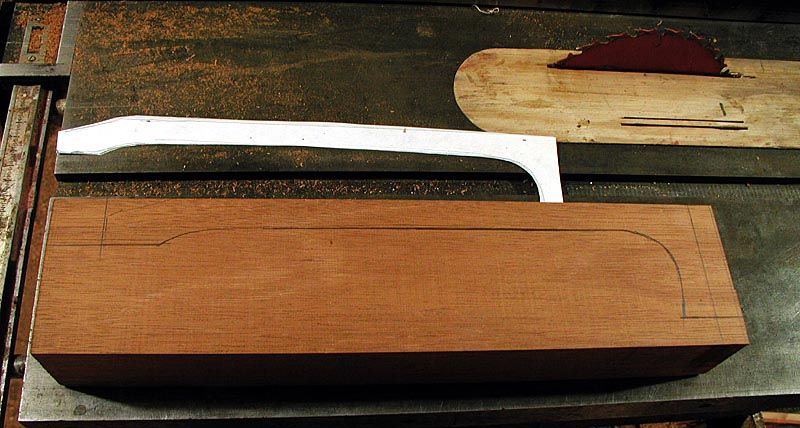
So I cut a blank and drew out the neck
Then I bandsawed it out
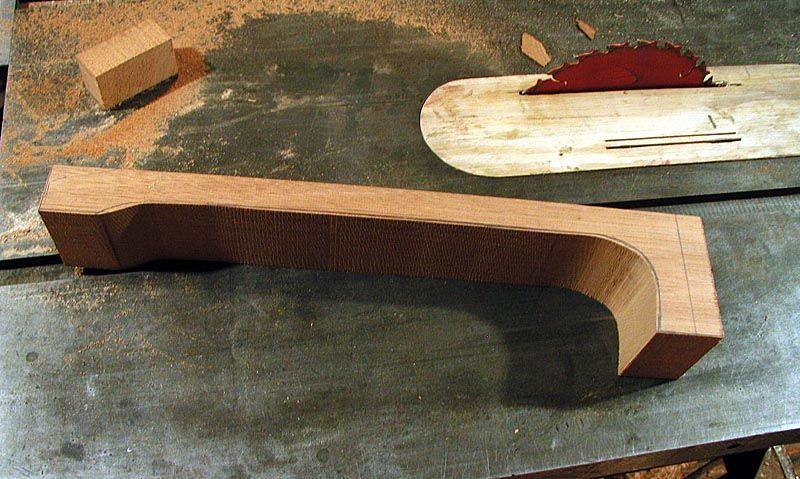
I was able to pick out a perfectly quartersawn offcut for this neck
Then I measured for the neck shaft length and made some side cuts to demark off the dovetail section and the "V" stub that the peghead will fit onto.
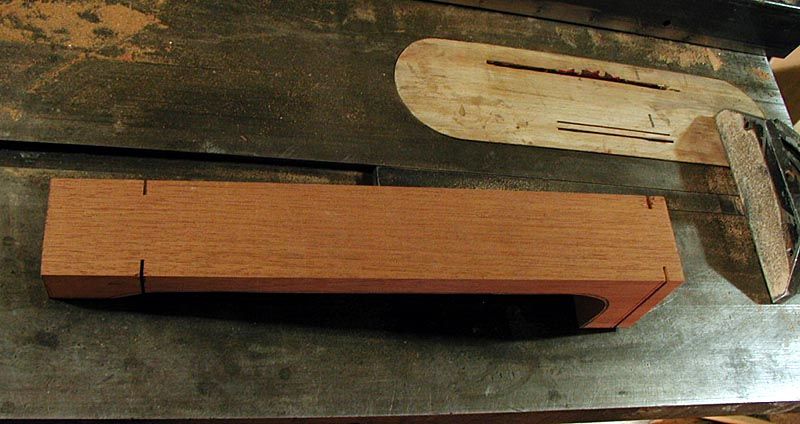
These will be cut to full depth by hand later in the process.
Since I am only making one neck, I did not go to the trouble of making any fancy jigs. I just set the table saw blade to 12 1/2 degrees and screwed a piece of plywood onto the miter guage and "went at it". First I did a test cut on some scrap...just in case
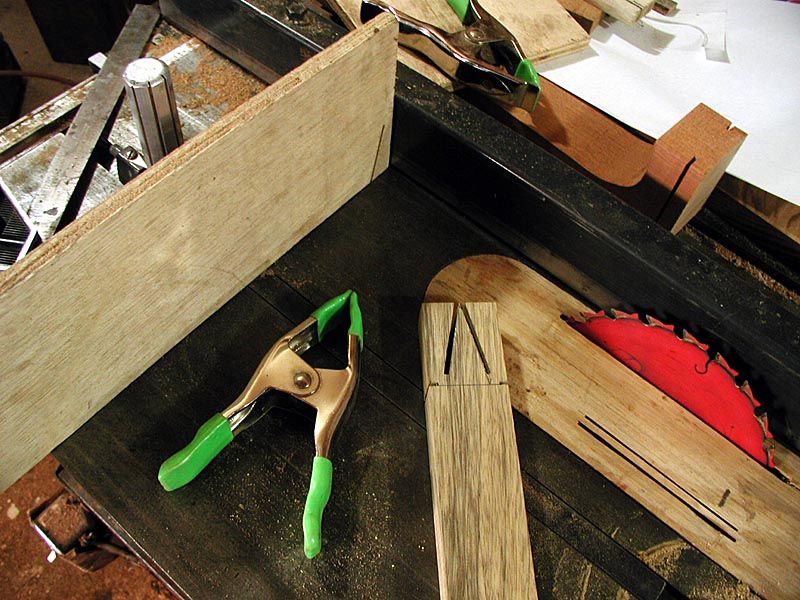
Looks fine...the rest will be cut by hand
So here is the setup
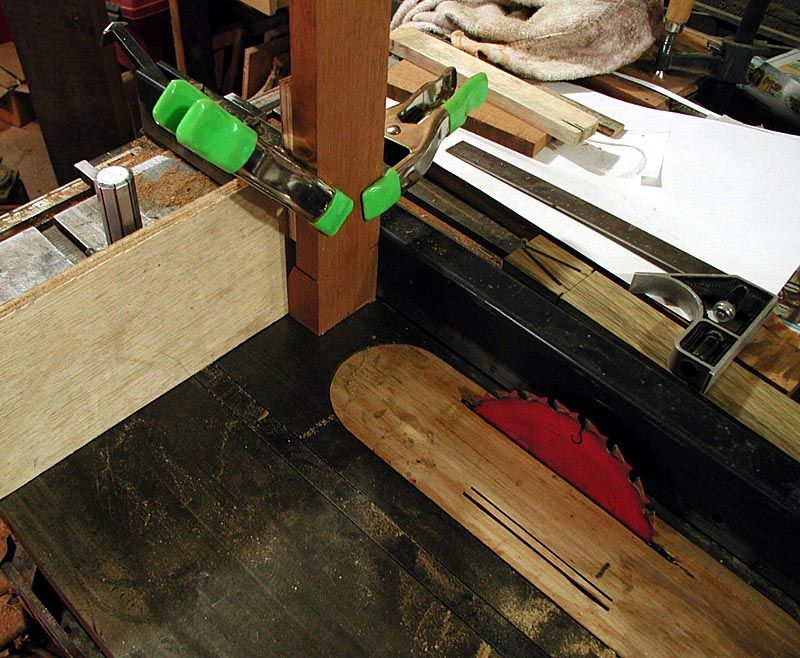
I set the rip fence to get the cut at the correct distance from the edge of the blank. Then I clamp the neck blank perfectly vertical and make the cut..
...Then turn the blank with the other edge to the rip fence and make the second cut
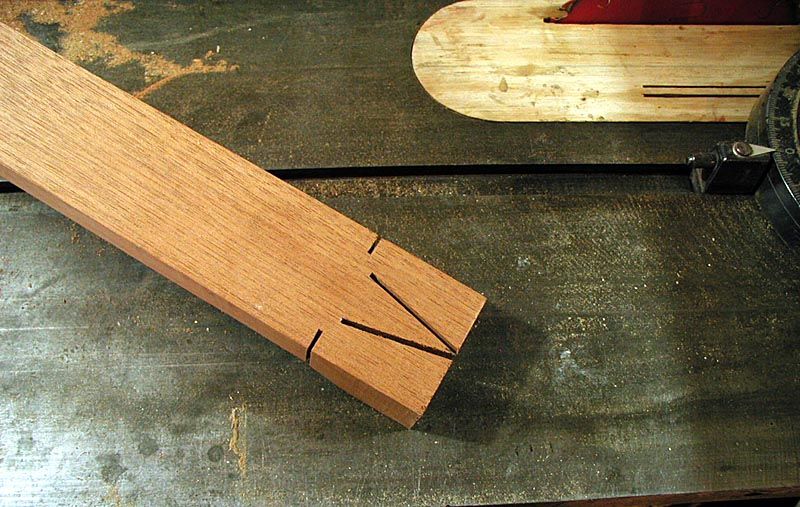
Like I said, the rest of the cut will be finished by hand and everything cleaned up
I cut the peghead out of another piece of mahogany "scrap". It is 5/8" thick and about 3" wide (for now), and 7" long. The end that will fit to the neck shaft is squared off at a 15 degree angle, the angle of the peghead to the neck. I left the table saw set up the same. Used an offcut from cutting the peghead from a 1-piece neck as a spacer..it already is cut to the 15 degree angle. To make the first cut of the "V" I used the spacer block to angle the peghead blank 15 degrees back
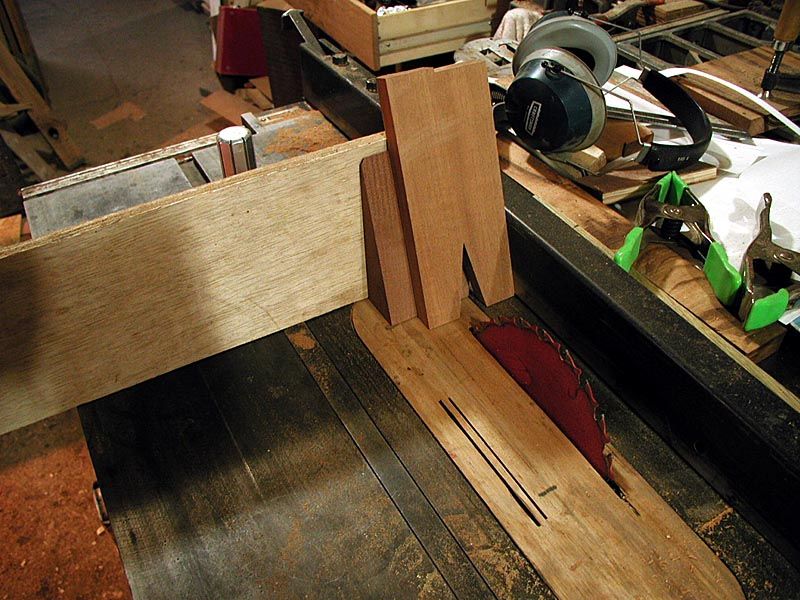
Then I flipped the spacer block to tilt the peghead 15 degrees forward and made the second cut
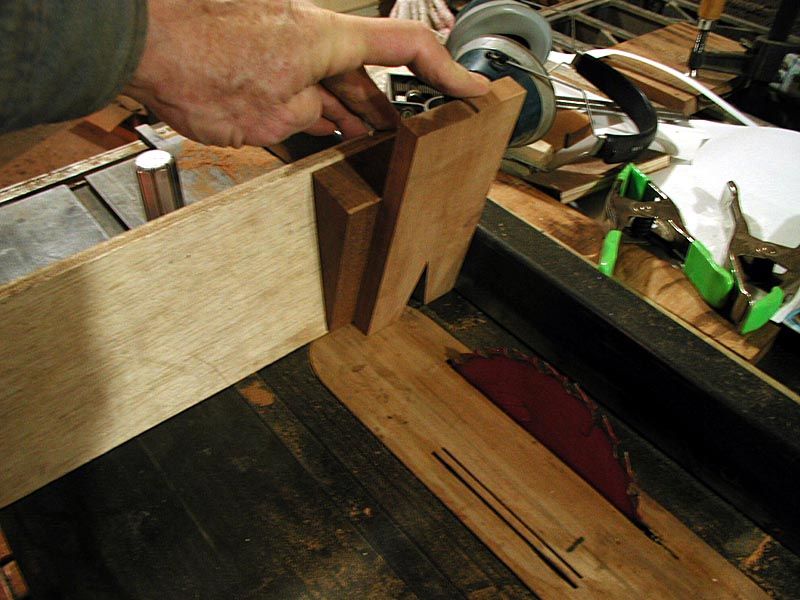
Actually, I had made the cuts before these 2 photos, and I had just shifted the rip fence over a tad to recut and widen the "V". Then all I had to do is cut out the very tip of the "V" with a knife and clean it up with a knife edge file
So here are the parts all cut
Only needed a slight bit of trimming (mostly used a small sanding block) to get a perfect fit
Here it is dry fit
I used thickened marine epoxy tinted brown to glue it up
So there it is. Just let the epoxy cure and clean it up. Now to be honest, I was kinda dreading the prospect of making this joint cuz I thought it would be one of those finikey things. But truth is that it went real easy and seemed to come out perfect. I might even do this on a regular basis
But I do owe a big thanks to Waddy and Arnt for showing the process and making it easy to understand. Without that, I might not have gotten up the nerve
G
One nice thing about this style of neck is that I can use shorter "scraps" of mahogany that are too small for a regular neck. Only needed a 16" long piece for the neck shaft.
So I cut a blank and drew out the neck

Then I bandsawed it out

I was able to pick out a perfectly quartersawn offcut for this neck
Then I measured for the neck shaft length and made some side cuts to demark off the dovetail section and the "V" stub that the peghead will fit onto.

These will be cut to full depth by hand later in the process.
Since I am only making one neck, I did not go to the trouble of making any fancy jigs. I just set the table saw blade to 12 1/2 degrees and screwed a piece of plywood onto the miter guage and "went at it". First I did a test cut on some scrap...just in case

Looks fine...the rest will be cut by hand
So here is the setup

I set the rip fence to get the cut at the correct distance from the edge of the blank. Then I clamp the neck blank perfectly vertical and make the cut..
...Then turn the blank with the other edge to the rip fence and make the second cut

Like I said, the rest of the cut will be finished by hand and everything cleaned up
I cut the peghead out of another piece of mahogany "scrap". It is 5/8" thick and about 3" wide (for now), and 7" long. The end that will fit to the neck shaft is squared off at a 15 degree angle, the angle of the peghead to the neck. I left the table saw set up the same. Used an offcut from cutting the peghead from a 1-piece neck as a spacer..it already is cut to the 15 degree angle. To make the first cut of the "V" I used the spacer block to angle the peghead blank 15 degrees back

Then I flipped the spacer block to tilt the peghead 15 degrees forward and made the second cut

Actually, I had made the cuts before these 2 photos, and I had just shifted the rip fence over a tad to recut and widen the "V". Then all I had to do is cut out the very tip of the "V" with a knife and clean it up with a knife edge file
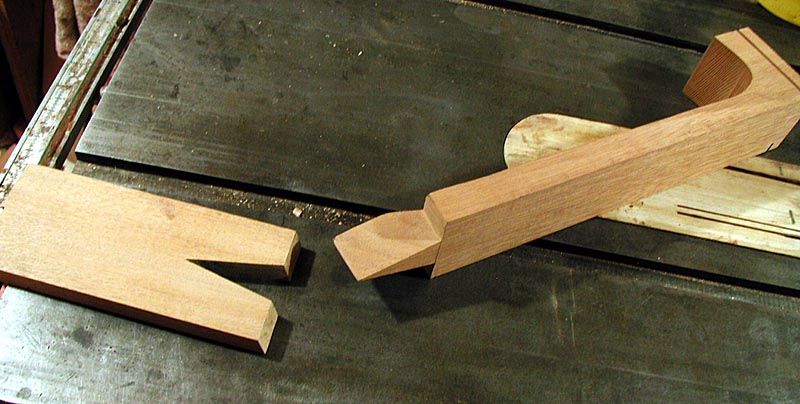
So here are the parts all cut

Only needed a slight bit of trimming (mostly used a small sanding block) to get a perfect fit
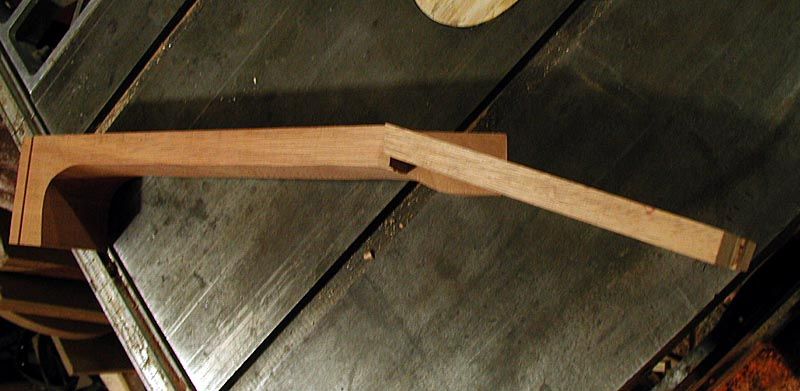
Here it is dry fit

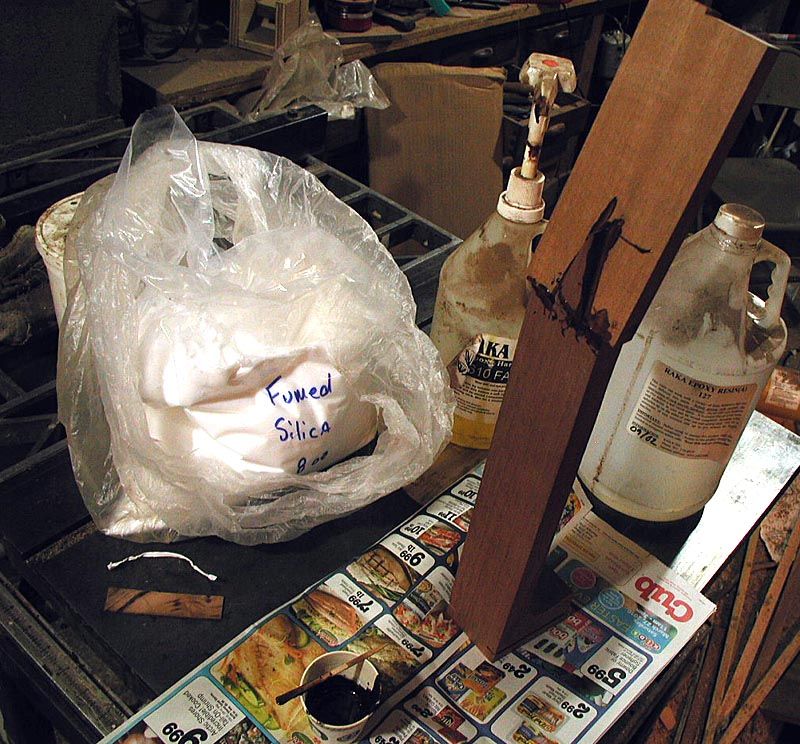
I used thickened marine epoxy tinted brown to glue it up

So there it is. Just let the epoxy cure and clean it up. Now to be honest, I was kinda dreading the prospect of making this joint cuz I thought it would be one of those finikey things. But truth is that it went real easy and seemed to come out perfect. I might even do this on a regular basis
But I do owe a big thanks to Waddy and Arnt for showing the process and making it easy to understand. Without that, I might not have gotten up the nerve
G
- Dennis Leahy
- Dishwasher
- Posts: 7082
- Joined: Thu Aug 21, 2008 1:59 am
- Include Off Topic: Yes
- Location: looking for a place to live
Re: Size 2 Martin build coming late October
Cool! Yet another way to skin that kitty.
Silica: just to thicken the epoxy so it won't run, or to make the epoxy work as a gap filler?
Dennis
p.s. Damn! It was cold today!
Silica: just to thicken the epoxy so it won't run, or to make the epoxy work as a gap filler?
Dennis
p.s. Damn! It was cold today!
Dennis Leahy
- whitespruce
- Site Admin
- Posts: 4367
- Joined: Thu Aug 21, 2008 6:53 am
- Include Off Topic: Yes
- Location: Northern Minnesota, USA
Re: Size 2 Martin build coming late October
The silica is to thicken the epoxy so it spreads like a glue rather than just soak into the wood. One of the many additives used to make thin runny epoxy into just about anything you wantDennis Leahy wrote:Cool! Yet another way to skin that kitty.
Silica: just to thicken the epoxy so it won't run, or to make the epoxy work as a gap filler?
Dennis
p.s. Damn! It was cold today!
Yes, cold today and colder tomorrow
G
- Rod True
- Posts: 496
- Joined: Sun Oct 19, 2008 11:00 pm
- Include Off Topic: Yes
- Location: Abbotsford BC, Canada
Re: Size 2 Martin build coming late October
Looking great Grant! I really like that rosette.
__________________________________________________________________________________________
Here's my shop
Tassie Blackwood/Lutz OSJ build
Here's my shop
Tassie Blackwood/Lutz OSJ build
