Looking very good so far Grant...beautiful work!
Thanks
Size 2 Martin build coming late October
- DaveAnderson
- Posts: 1123
- Joined: Fri Nov 21, 2008 10:18 am
- Include Off Topic: Yes
- Location: Clearwater,Fl.
Re: Size 2 Martin build coming late October
Anderson Guitars
Clearwater,Fl.
Clearwater,Fl.
Re: Size 2 Martin build coming late October
Grant,
I'd respond more readily if I weren't standing in awe. Just keep posting and I'll keep reading! Thanks.
Jim
I'd respond more readily if I weren't standing in awe. Just keep posting and I'll keep reading! Thanks.
Jim
"When people hear good music, it makes them homesick for something they never had and never will have." -- Edgar Watson Howe
- whitespruce
- Site Admin
- Posts: 4367
- Joined: Thu Aug 21, 2008 6:53 am
- Include Off Topic: Yes
- Location: Northern Minnesota, USA
Re: Size 2 Martin build coming late October
Well, it's time to do the bindings.
Here are a couple of photos of my binding channel routing setup
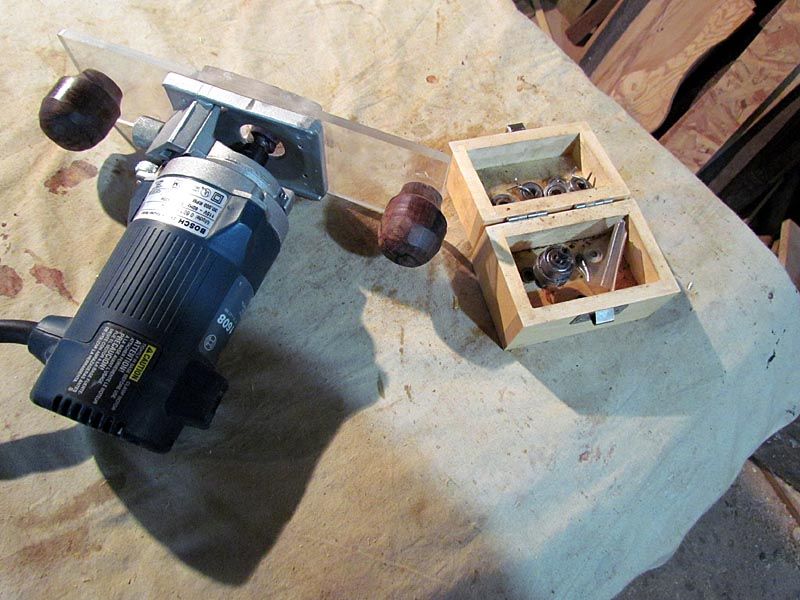
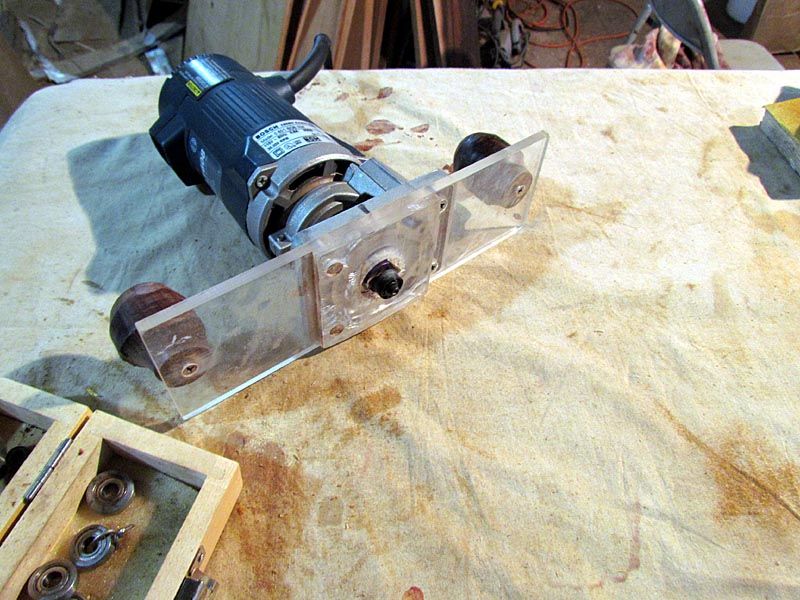
Yup, that's it.....all of it
Here is a closeup of the business end of the system
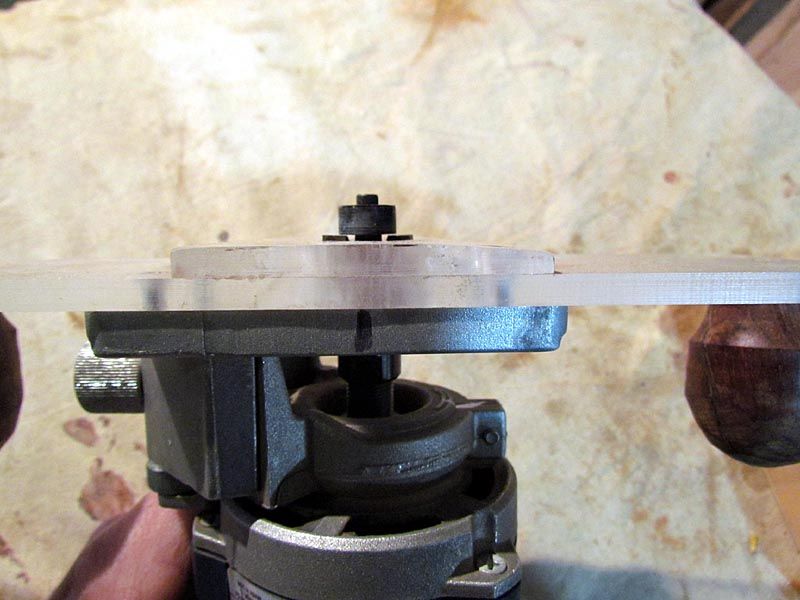
Notice the raised platform has a steeper bevel on the right and less so on the left. The steep side is for routing the back with more arch and the less steep side is for the top
The cutter I use is from Grizzly and I have suplemented the bearings with 4 or 5 from Stew Mac. Even at that, I don't have an exact size to fit this wide purfling, so...
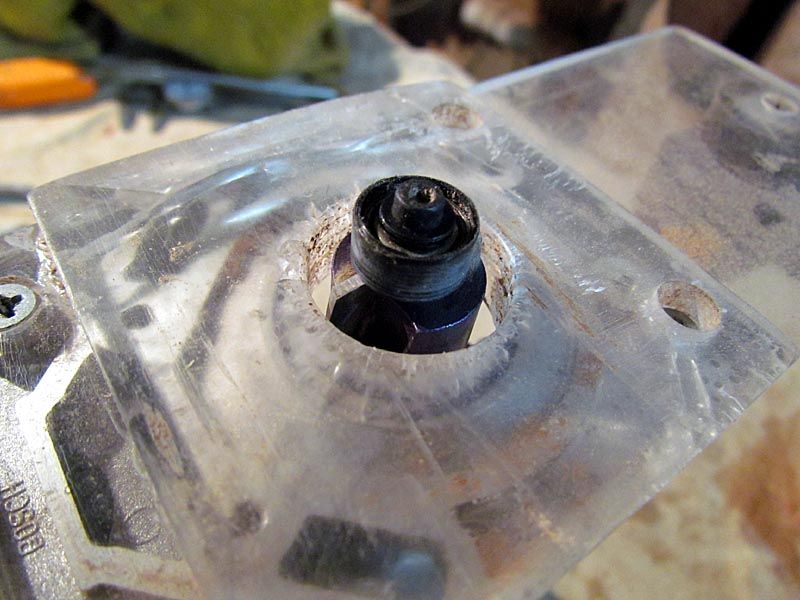
...I have wrapped a few rounds of pinstripe tape around the bearing to build it up
Here is what I used
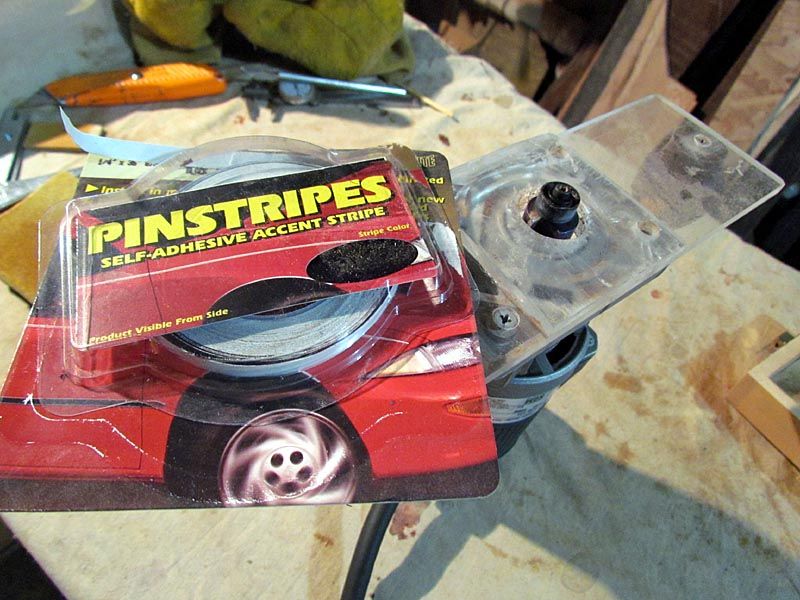
Put on enough wraps till a test cut gave me the right size channel. Be sure to wrap the right direction so the end won't catch if the bearing spins with the cutter a bit
So it is just a matter of turning on the router and going around the edge of the guitar body. Might sound scarey, but nothing bad can happen. Here is how I hold the router baseplate on the guitar body
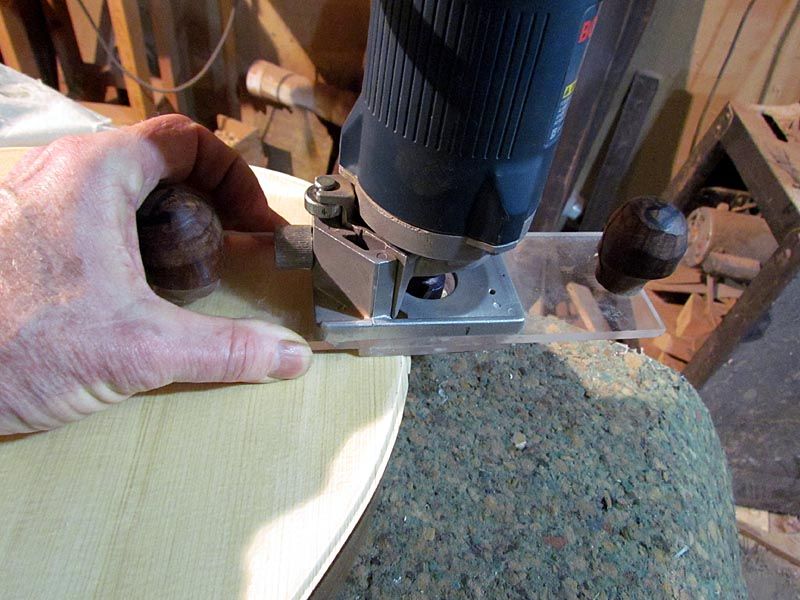
Notice how I steady it so as to keep the router body vertical? This is very easy to do once you get the hang of it. Main thing is to take your time and work around in segments, backing the bit off the guitar while you are repositioning.
A few more photos of the process
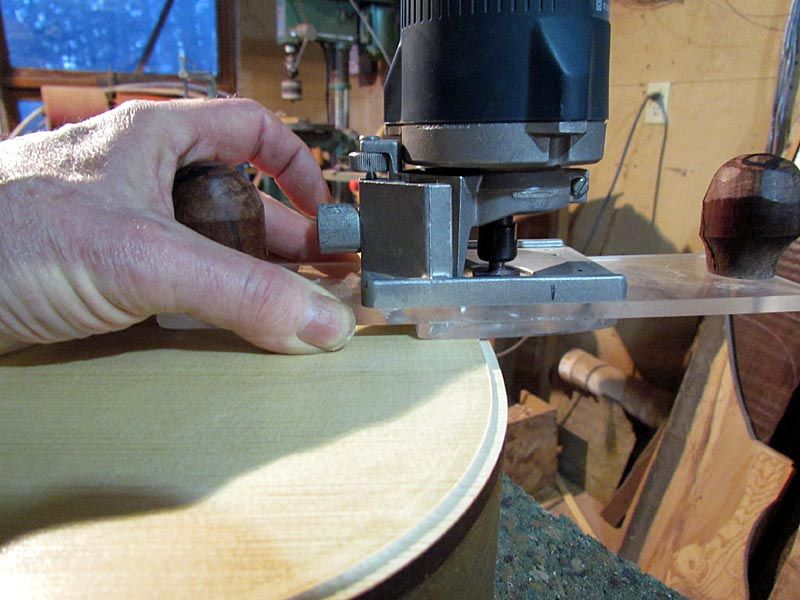
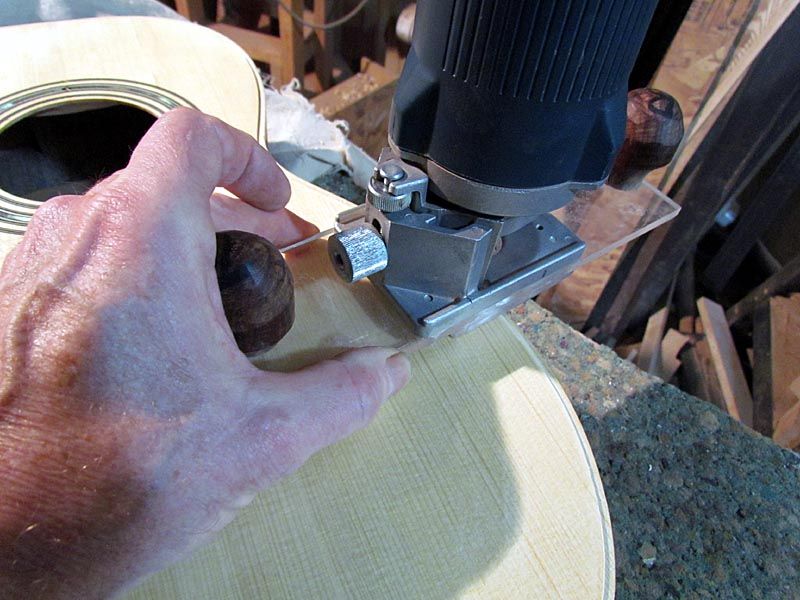
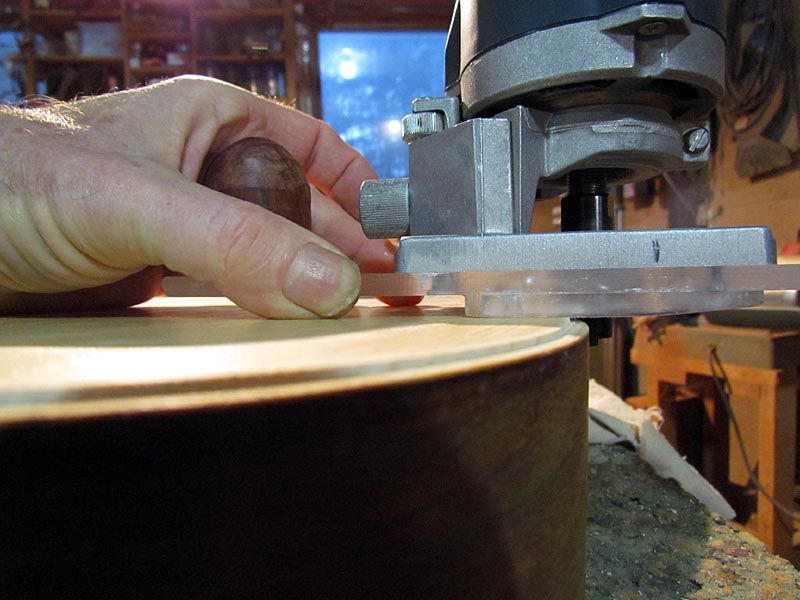
Notice on the last one the space I am maintaining between the base and the guitar top. I keep that pretty even all around the top, but doing the back, it will vary a lot from the neck end to the tail.
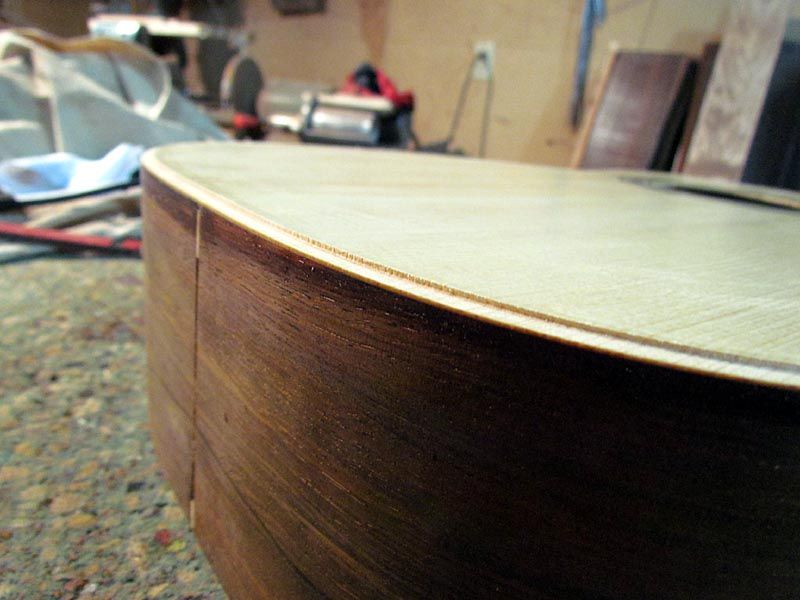
So here is the top purfling channel cut
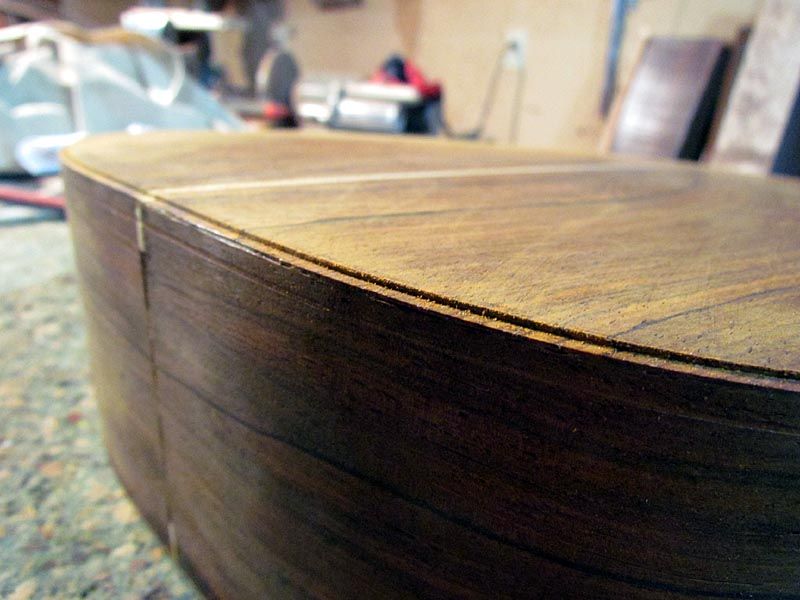
And the back
And here are the top and back binding channels
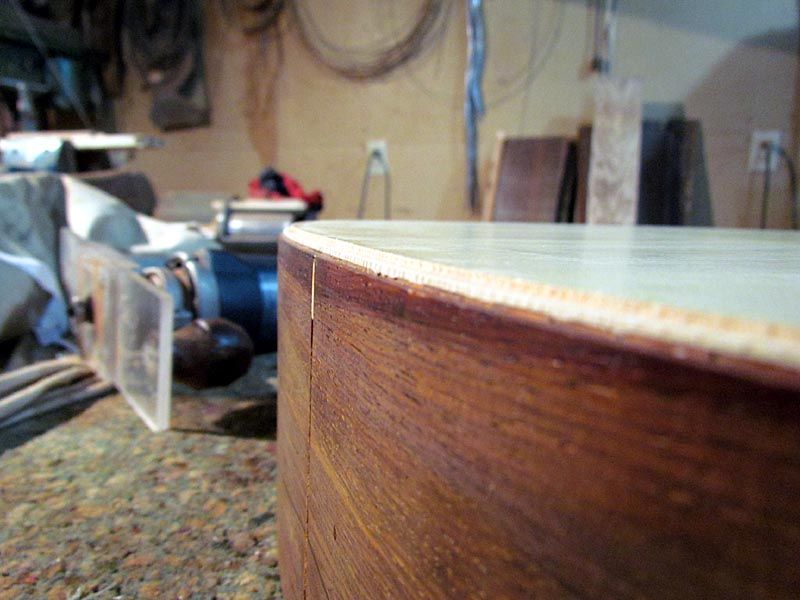
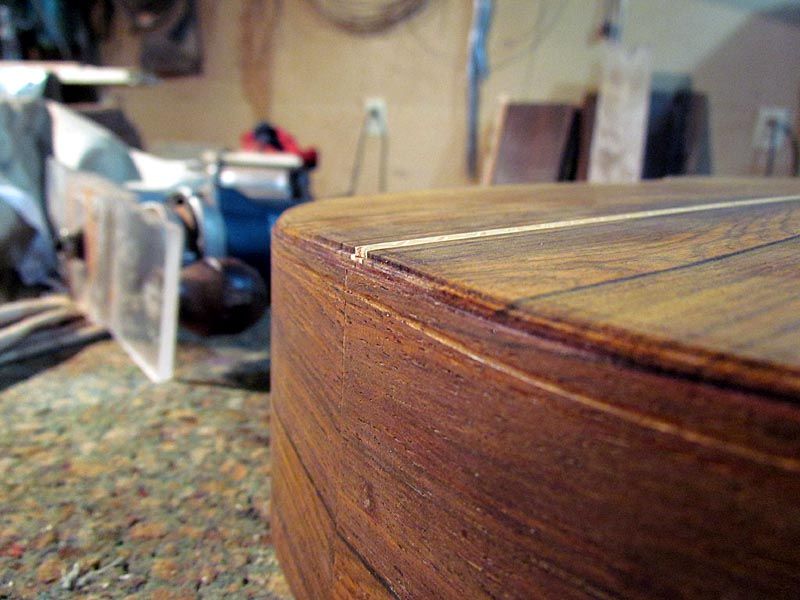
BTW, the "bathtub ring" on the side of that last photo is just a rub mark from the bearing. A damp cloth with warm water makes it go away.
So that is done, Took less than a minute for each of the 4 cuts. The most time consuming part was setting up the depth and choosing the right bearing.
On to the end graft.
G
Here are a couple of photos of my binding channel routing setup


Yup, that's it.....all of it
Here is a closeup of the business end of the system

Notice the raised platform has a steeper bevel on the right and less so on the left. The steep side is for routing the back with more arch and the less steep side is for the top
The cutter I use is from Grizzly and I have suplemented the bearings with 4 or 5 from Stew Mac. Even at that, I don't have an exact size to fit this wide purfling, so...

...I have wrapped a few rounds of pinstripe tape around the bearing to build it up
Here is what I used

Put on enough wraps till a test cut gave me the right size channel. Be sure to wrap the right direction so the end won't catch if the bearing spins with the cutter a bit
So it is just a matter of turning on the router and going around the edge of the guitar body. Might sound scarey, but nothing bad can happen. Here is how I hold the router baseplate on the guitar body

Notice how I steady it so as to keep the router body vertical? This is very easy to do once you get the hang of it. Main thing is to take your time and work around in segments, backing the bit off the guitar while you are repositioning.
A few more photos of the process


Notice on the last one the space I am maintaining between the base and the guitar top. I keep that pretty even all around the top, but doing the back, it will vary a lot from the neck end to the tail.
So here is the top purfling channel cut

And the back

And here are the top and back binding channels


BTW, the "bathtub ring" on the side of that last photo is just a rub mark from the bearing. A damp cloth with warm water makes it go away.
So that is done, Took less than a minute for each of the 4 cuts. The most time consuming part was setting up the depth and choosing the right bearing.
On to the end graft.
G
- whitespruce
- Site Admin
- Posts: 4367
- Joined: Thu Aug 21, 2008 6:53 am
- Include Off Topic: Yes
- Location: Northern Minnesota, USA
Re: Size 2 Martin build coming late October
So before I can instal the binding and purfling, I gotta do the end graft. This will be made from a piece of grained ivoroid surrounded by b/w purflings.
I cut the ivoroid piece and used it as a pattern. I just stuck it in place with some tape and sawed along each side, then chiseled out the space
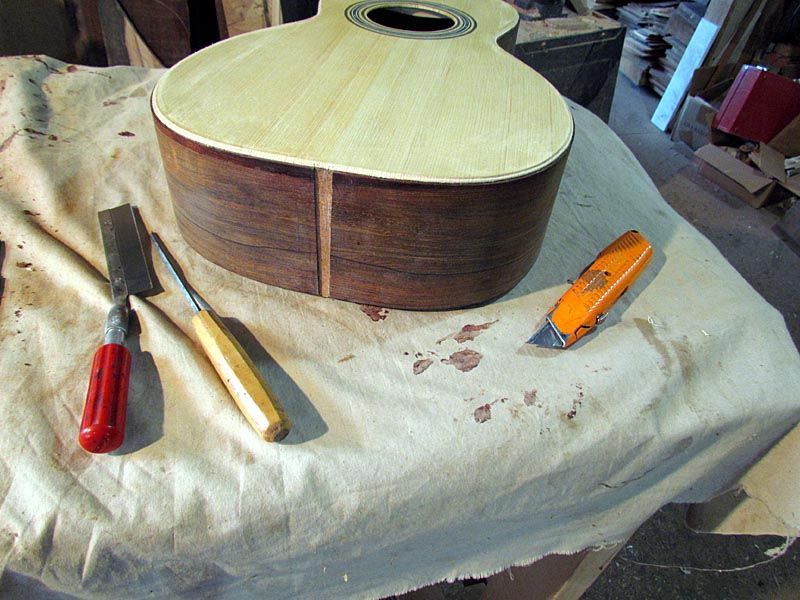
The width of the saw cut plus a bit of cleanup about gave me the room I needed for the purfling lines. I just sanded down the ivoroid edges a bit for the fine tuning.
Here are all the parts
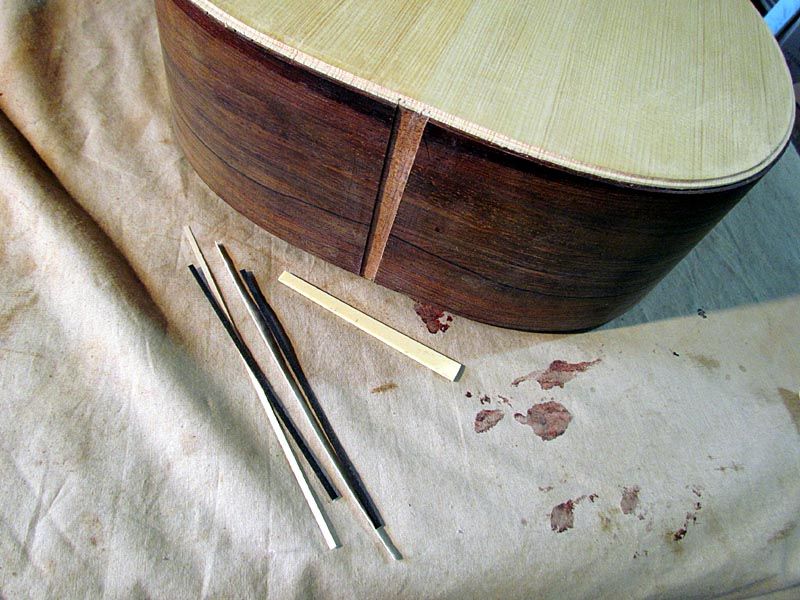
And here it is glued in
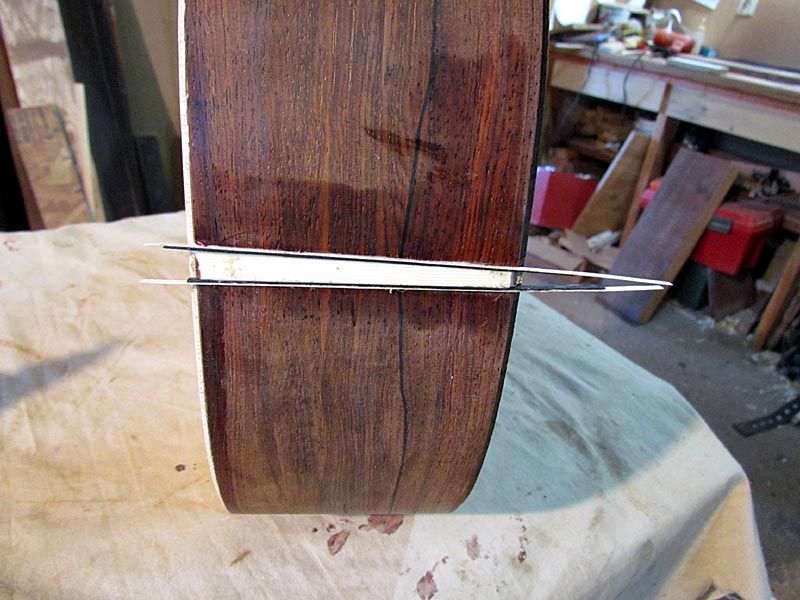
Just had to glue some purflings on the ends and scrape things down flush
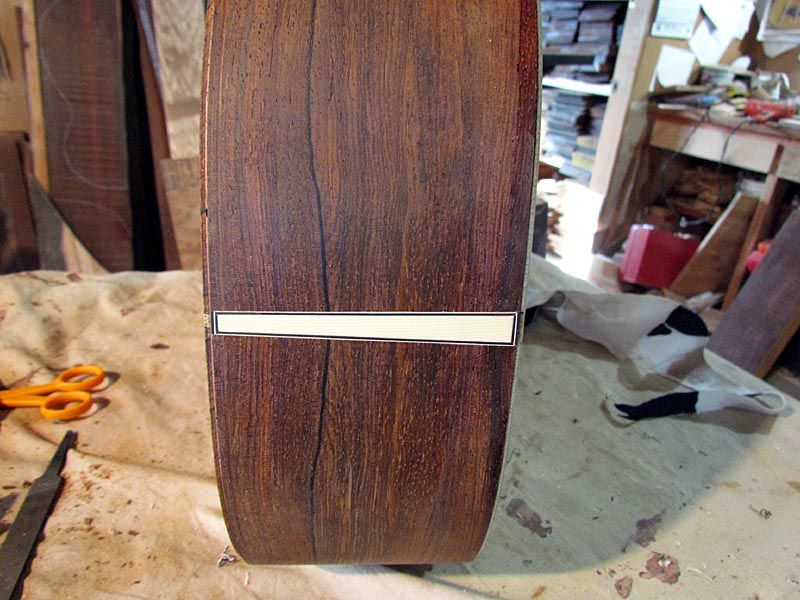
And compared to the original
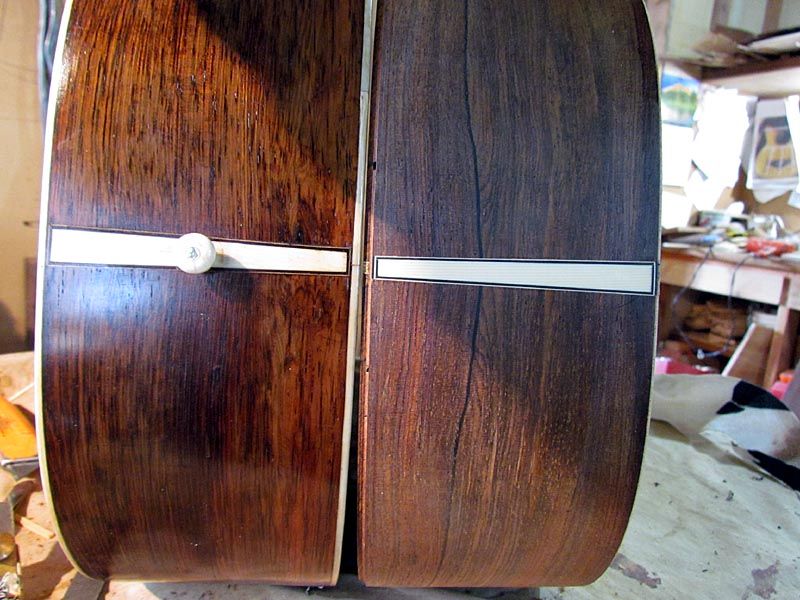
With that done, I can start putting on the purflings and bindings.
G
I cut the ivoroid piece and used it as a pattern. I just stuck it in place with some tape and sawed along each side, then chiseled out the space

The width of the saw cut plus a bit of cleanup about gave me the room I needed for the purfling lines. I just sanded down the ivoroid edges a bit for the fine tuning.
Here are all the parts

And here it is glued in

Just had to glue some purflings on the ends and scrape things down flush

And compared to the original

With that done, I can start putting on the purflings and bindings.
G
- whitespruce
- Site Admin
- Posts: 4367
- Joined: Thu Aug 21, 2008 6:53 am
- Include Off Topic: Yes
- Location: Northern Minnesota, USA
Re: Size 2 Martin build coming late October
OK, now the easy part. Since I assembled the top purflings to the guitar shape, gluing them in place was very easy. Just needed enough tape to snug them into place
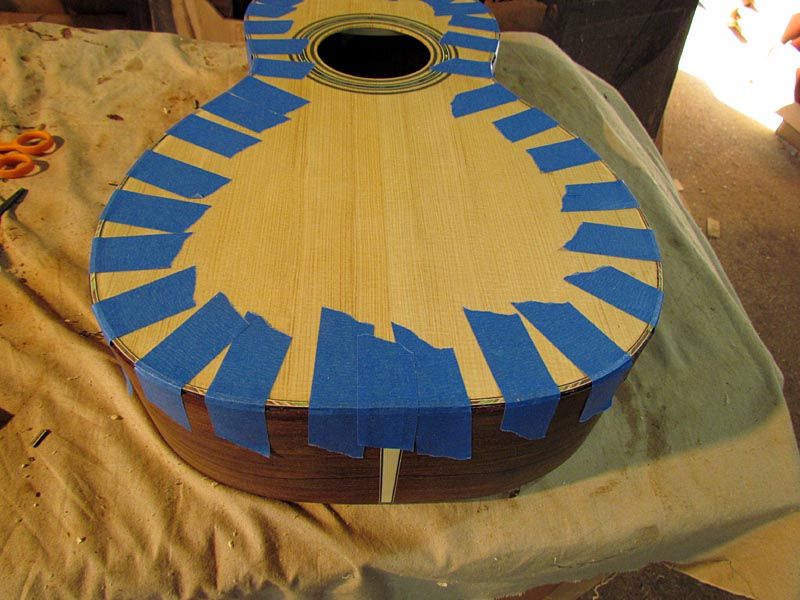
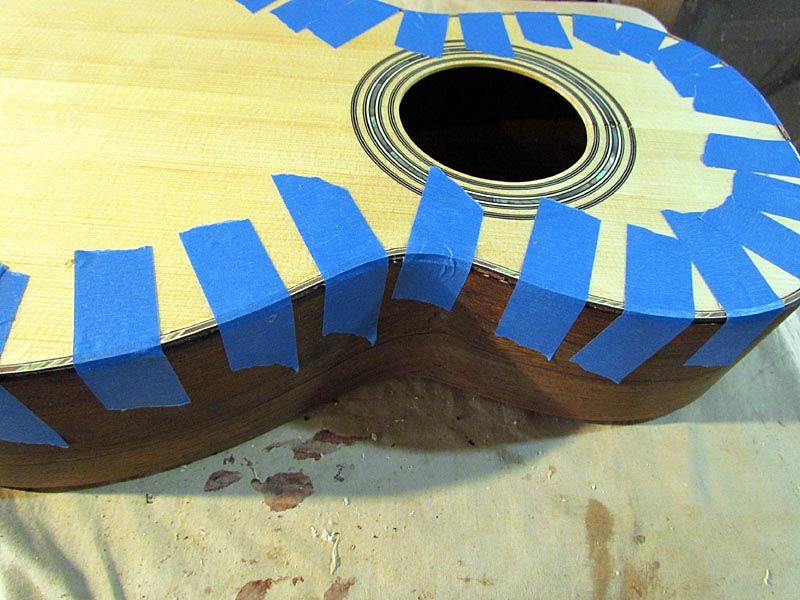
I just used the Elmer's wood glue for these
When that set up, I ckeaned up the binding channels. The binding will be ivoroid. Since these bindings are only to be 1/8" tall, I ripped the 1/4" wide ivoroid down to a fat 1/8" on the bandsaw. I had pieces long enough to go around the whole guitar. I used the acryloid B-72 disolved in acetone as glue and just brushed it into the channel ahead of the binding. Snugged it tight into place and added some tape strips. Only took a couple of minutes to go around the top.
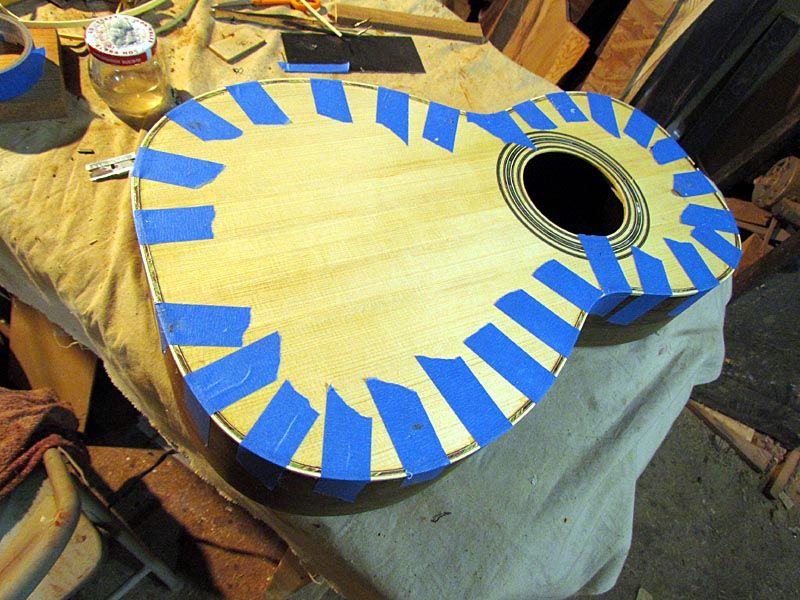
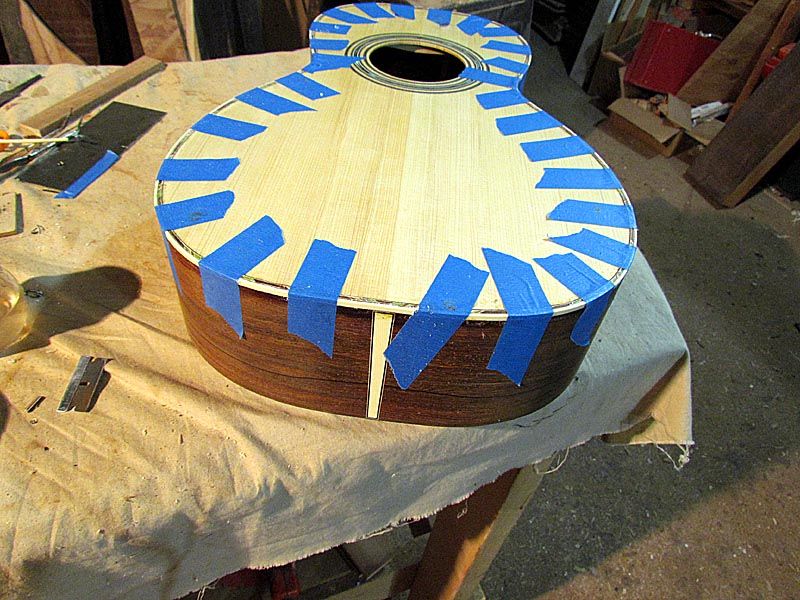
And a closer look
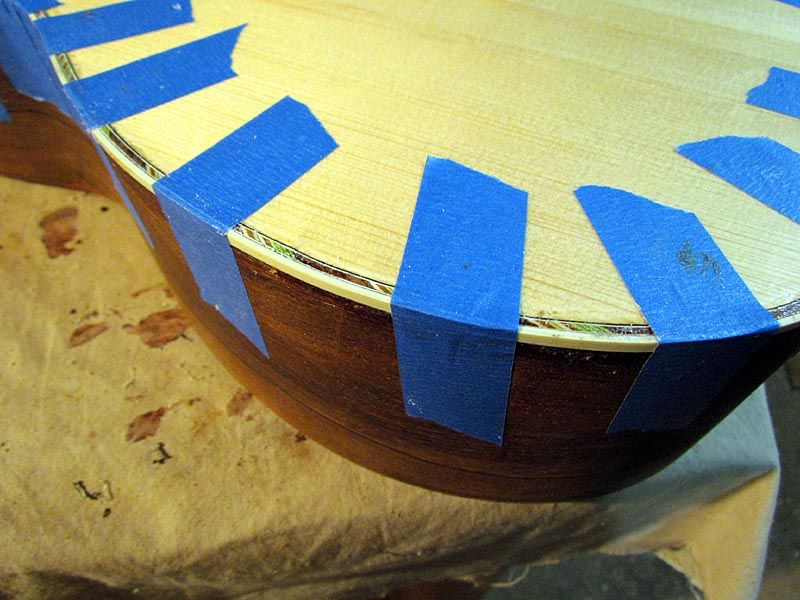
Just got to do the back and clean things up, and that's the box. Comments and questions are welcome.
G


I just used the Elmer's wood glue for these
When that set up, I ckeaned up the binding channels. The binding will be ivoroid. Since these bindings are only to be 1/8" tall, I ripped the 1/4" wide ivoroid down to a fat 1/8" on the bandsaw. I had pieces long enough to go around the whole guitar. I used the acryloid B-72 disolved in acetone as glue and just brushed it into the channel ahead of the binding. Snugged it tight into place and added some tape strips. Only took a couple of minutes to go around the top.


And a closer look

Just got to do the back and clean things up, and that's the box. Comments and questions are welcome.
G
Re: Size 2 Martin build coming late October
Very nicely done Grant!
That's going to be a beaut!
That's going to be a beaut!
Johann D. Brentrup
http://www.brentrup.com" onclick="window.open(this.href);return false;
http://www.brentrup.com" onclick="window.open(this.href);return false;
- Dennis Leahy
- Dishwasher
- Posts: 7082
- Joined: Thu Aug 21, 2008 1:59 am
- Include Off Topic: Yes
- Location: looking for a place to live
Re: Size 2 Martin build coming late October
Wow, Grant! That is some gorgeous workmanship, and so faithful to the original.
I know the black stripe in the sides may have a bit less contrast over time, but you obviously took great care in getting the symmetry at the butt 'just so', keeping that black line continuous, and it really sets off the artistry of the wood pieces.
This is already such a lovely guitar - I can't wait to play it!
Dennis
Dennis Leahy
- garydemos
- Posts: 140
- Joined: Sat Aug 23, 2008 6:36 pm
- Include Off Topic: Yes
- Location: Hilliard, OH
- Contact:
Re: Size 2 Martin build coming late October
Grant - nice job! I love what you're doing here. I've had a chance to do some repair work on several old Martins in the 1850 - 1870 range and it makes grow more in love with these little gems. Thanks for sharing this...
Gary
Gary
