I WISH!
But truth be told, it IS happening, we WILL get stabilized and have a shop again, and it will NOT be too long...
Thank God for small miracles!!
E
My Winter building plans
- whitespruce
- Site Admin
- Posts: 4367
- Joined: Thu Aug 21, 2008 6:53 am
- Include Off Topic: Yes
- Location: Northern Minnesota, USA
Re: My Winter building plans
Hey E, I know I don't gotta tell ya how much we are looking forward to that, but I will. Been waaay to long and you need some serious shop timeEben wrote:I WISH!
But truth be told, it IS happening, we WILL get stabilized and have a shop again, and it will NOT be too long...
Thank God for small miracles!!
E
It was really great to have Dennis in the shop today. Just wish he lived closer so we could do it more often. Usually we spend so much time just catching up and BS'ing that we don't get near enough done, but today we got Dennis all squared away for his next build. Still a few parts to do and a bunch more things to sand for the whole pile of guitars that he has planned, but I will let him fill you in on that.
After Dennis left, I bent 2 more sides and glued the fingerboard onto the neck for my beng jumbo, so it was a very productive day.
G
-
howie123
- Posts: 334
- Joined: Sat Mar 10, 2012 3:13 am
- Include Off Topic: Yes
- Location: Sunderland, North East England
- Contact:
Re: My Winter building plans
I got one of these.....dont get much cheaper andit seems to work well enough http://www.ebay.co.uk/itm/Indoor-Outdoo ... 3a68ca16db" onclick="window.open(this.href);return false; ... I'm gonna get one of these too, also very cheap http://www.ebay.co.uk/itm/LCD-Display-I ... 519d4c683e" onclick="window.open(this.href);return false; should give you a close enough idea of the relative humidity in your shop/ drying area. If you have space for a small cupboard that you can seal with foam draught excluder tape and place a dessicant dehumidifier in there with your wood along with a small fan the heat from the fan motor combined with the air movement caused by the fan will dry the wood out and the dessicant absorbs the moisture and traps it by turning to a gel, they last about 3 months or so and are very cheap to buy, thinner wood will dry faster and more thouroughly ie guitar sets than heavier timber such as neck blanks but they will dry out eventually.
Chief Woodbotherer @ Littlefair Luthiery
- whitespruce
- Site Admin
- Posts: 4367
- Joined: Thu Aug 21, 2008 6:53 am
- Include Off Topic: Yes
- Location: Northern Minnesota, USA
Re: My Winter building plans
Today was a warm, Spring-like day and I do not as yet have a very big pile of firewood for the shop. So I took much of the day to chainsaw up a bunch of slabwood and haul it to the shop. After that, I needed a break, so I spent some time working in the shop....not on priority stuff, but building stuff 

Yesterday, I had finished bending the last of 9 sets of sides (some were previously bent) for my batch of guitars. The last set was ovangkol and it had some localized runnout in the upper bout area. Some of the wood fibers blew out and lifted during the bending. It was worst on the non-cutaway side, but also showed on the cutaway side. I decided to try and fix this set rather than bend another set.
First I took a clothes iron, dampened the errant wood fibers, and tried to iron them flat. This at least got the fix started. Then I worked hide glue into the voids and clamped the bad area between some cauls.
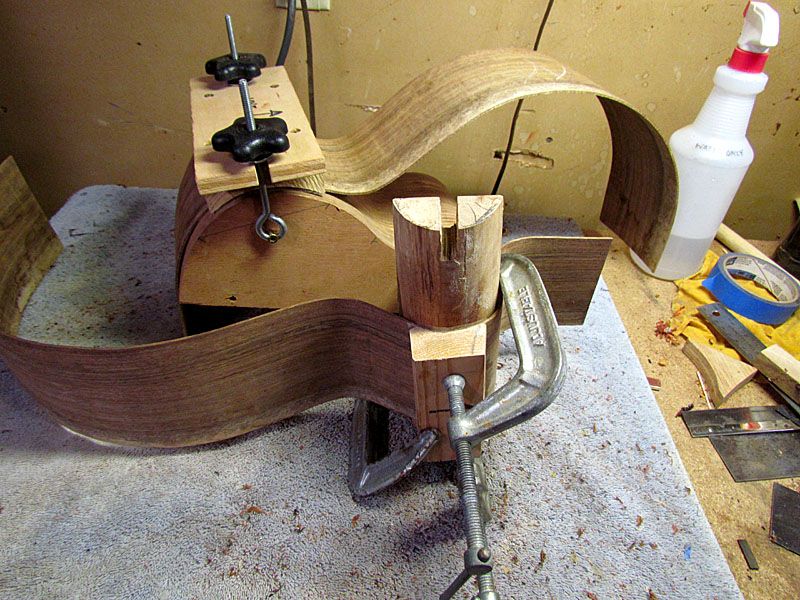
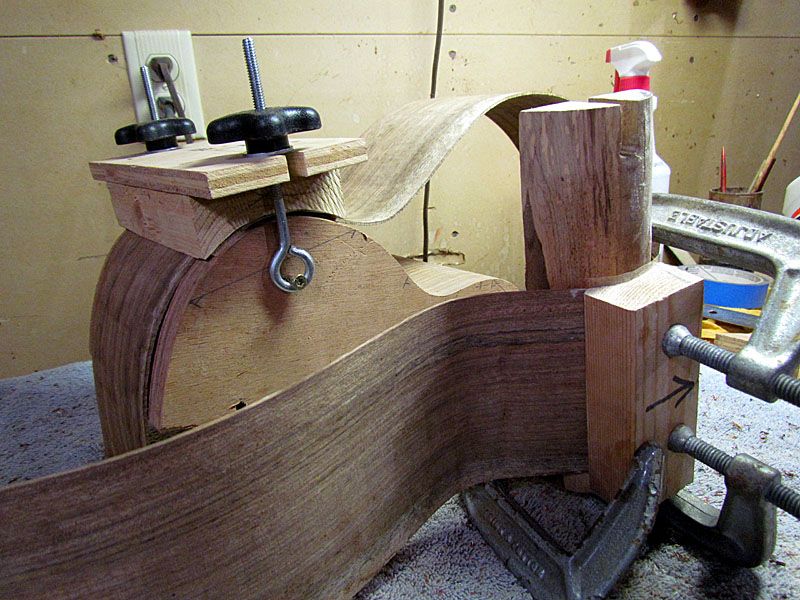
As you can see, I used whatever fit the curve best. I covered the cauls with packing tape to prevent the glue from sticking and clamped them as tightly as I could
This afternoon, I took off the cauls
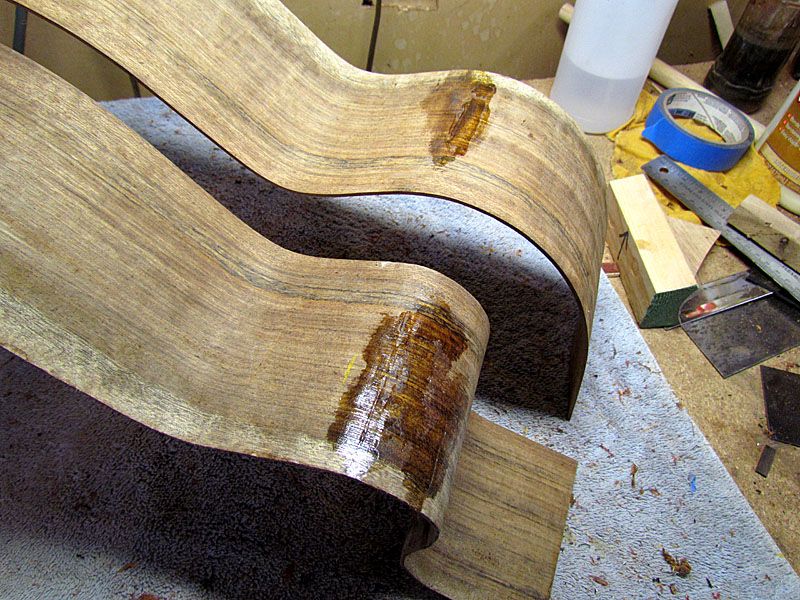
The mess is just excess glue.
After scraping off most of the glue and a light sanding, they looked like this
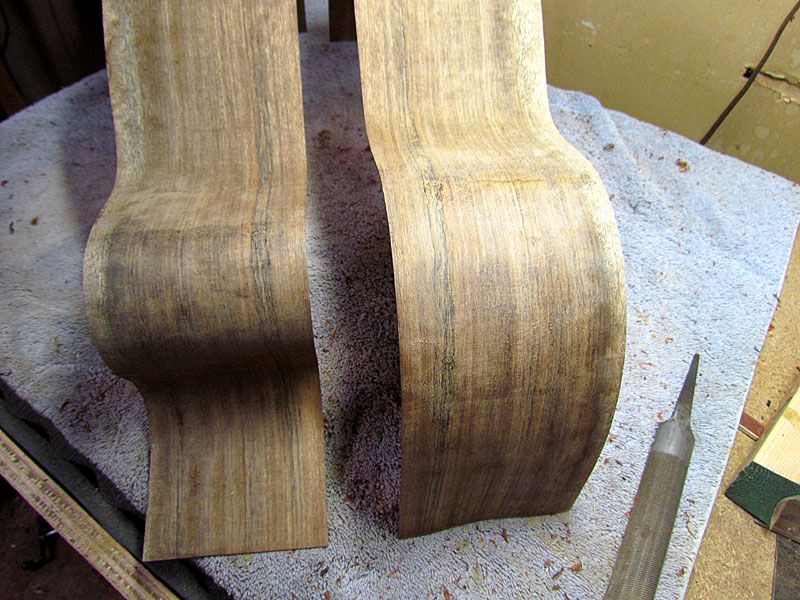
I think that after assembly and final sanding, they should be fine. Lucked out again.
G
Yesterday, I had finished bending the last of 9 sets of sides (some were previously bent) for my batch of guitars. The last set was ovangkol and it had some localized runnout in the upper bout area. Some of the wood fibers blew out and lifted during the bending. It was worst on the non-cutaway side, but also showed on the cutaway side. I decided to try and fix this set rather than bend another set.
First I took a clothes iron, dampened the errant wood fibers, and tried to iron them flat. This at least got the fix started. Then I worked hide glue into the voids and clamped the bad area between some cauls.


As you can see, I used whatever fit the curve best. I covered the cauls with packing tape to prevent the glue from sticking and clamped them as tightly as I could
This afternoon, I took off the cauls

The mess is just excess glue.
After scraping off most of the glue and a light sanding, they looked like this

I think that after assembly and final sanding, they should be fine. Lucked out again.
G
- whitespruce
- Site Admin
- Posts: 4367
- Joined: Thu Aug 21, 2008 6:53 am
- Include Off Topic: Yes
- Location: Northern Minnesota, USA
Re: My Winter building plans
One more quick post.
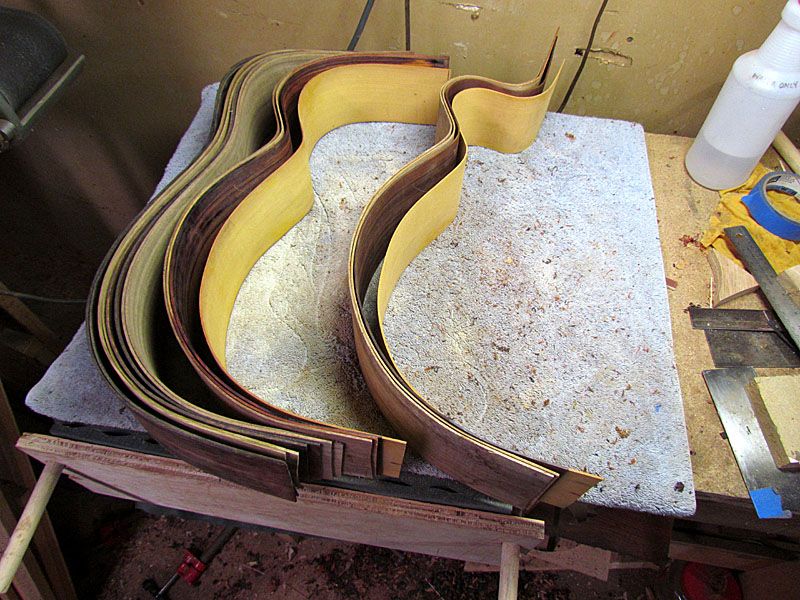
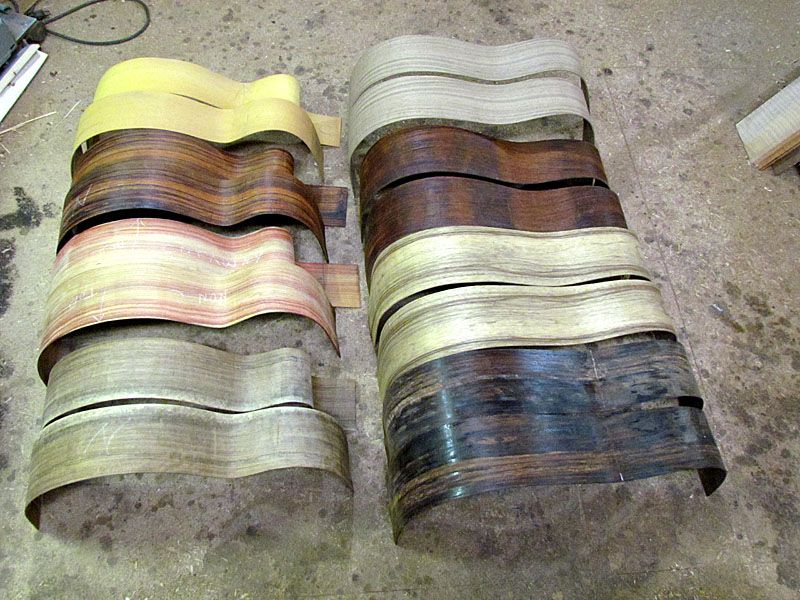
With the latest side bending, I now have bent sides ready for 9 guitars. I already showed the snakewood bent sides. Here are the rest.
And here they are laid out for a better look
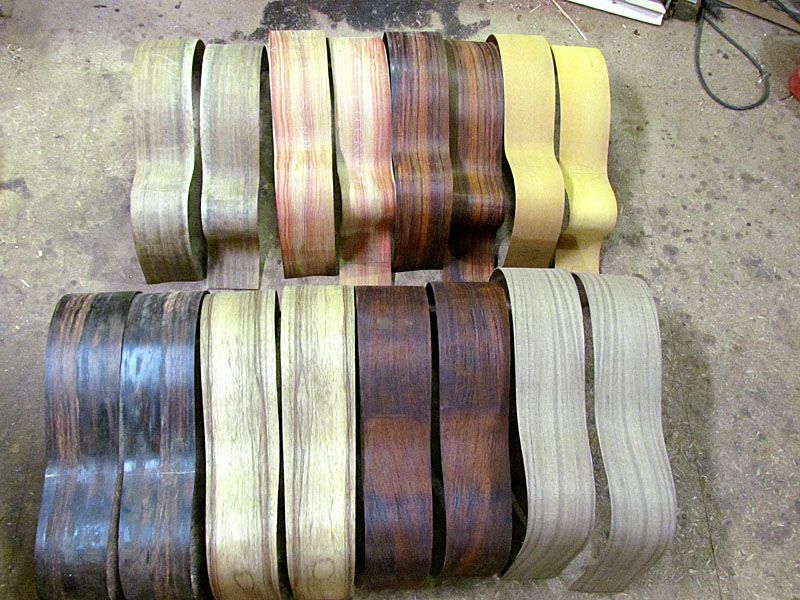
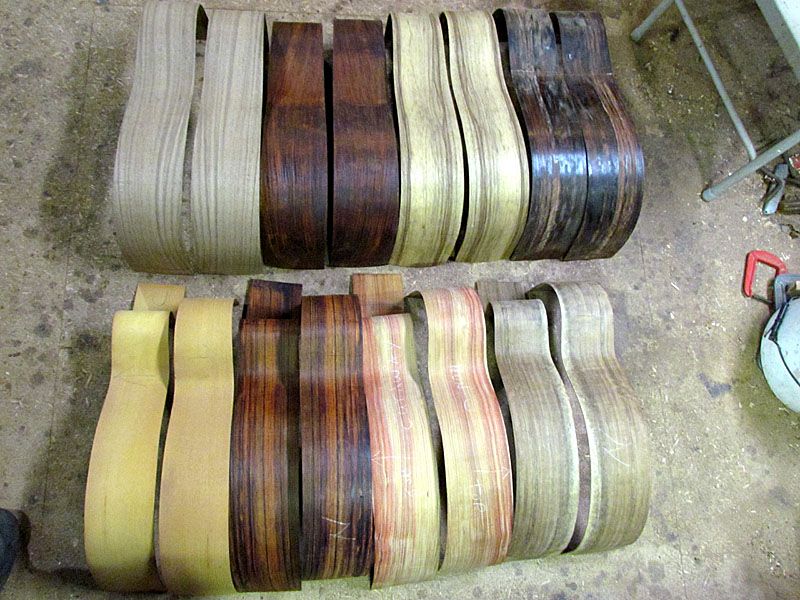
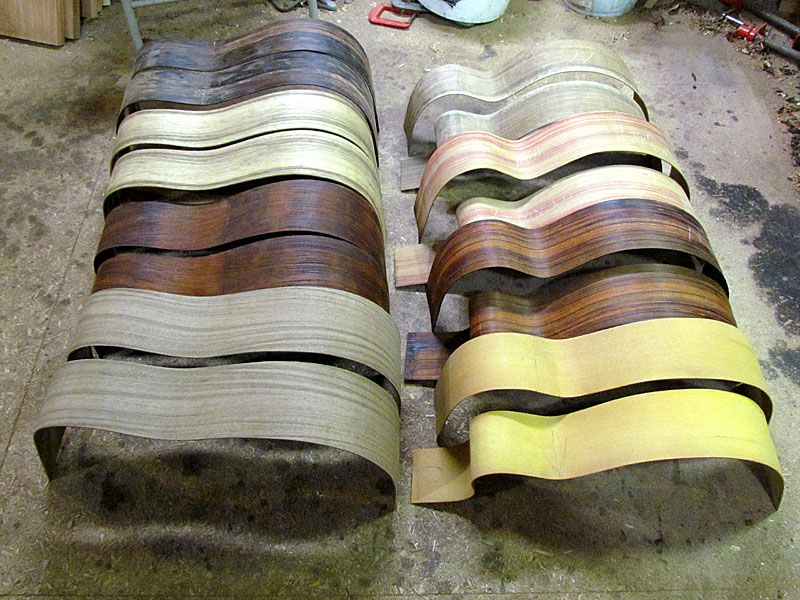
Top row L to R: Ovangkol jumbo, Pau Rosa jumbo, old striped Cocobolo jumbo, and Osage Orange OM. Bottom row L to R: "Flying Coco" Cocobolo dread, Black Limba dread, curly Cocobolo dread, and Central American Laurel dread.
A few more angles
Another item on my list for this batch is to cut out the pearl for peghead logos. Here are patterns glued to various blanks for some of these plus the 3 that I have almost done

I will need to do 2 or 3 more.
And here is one cut out and cleaned up

Now, I guess I better get back to the priority things.
G
With the latest side bending, I now have bent sides ready for 9 guitars. I already showed the snakewood bent sides. Here are the rest.

And here they are laid out for a better look

Top row L to R: Ovangkol jumbo, Pau Rosa jumbo, old striped Cocobolo jumbo, and Osage Orange OM. Bottom row L to R: "Flying Coco" Cocobolo dread, Black Limba dread, curly Cocobolo dread, and Central American Laurel dread.
A few more angles


Another item on my list for this batch is to cut out the pearl for peghead logos. Here are patterns glued to various blanks for some of these plus the 3 that I have almost done

I will need to do 2 or 3 more.
And here is one cut out and cleaned up

Now, I guess I better get back to the priority things.
G
Re: My Winter building plans
WOWZAAA!!
Grant looks like your getting into mass production!! Martin better watch out!! hehehe
Everything looks great to me, looking forward to seeing them all come together.
Joel
Grant looks like your getting into mass production!! Martin better watch out!! hehehe
Everything looks great to me, looking forward to seeing them all come together.
Joel
- whitespruce
- Site Admin
- Posts: 4367
- Joined: Thu Aug 21, 2008 6:53 am
- Include Off Topic: Yes
- Location: Northern Minnesota, USA
Re: My Winter building plans
Thanks for the kind words, Joel.
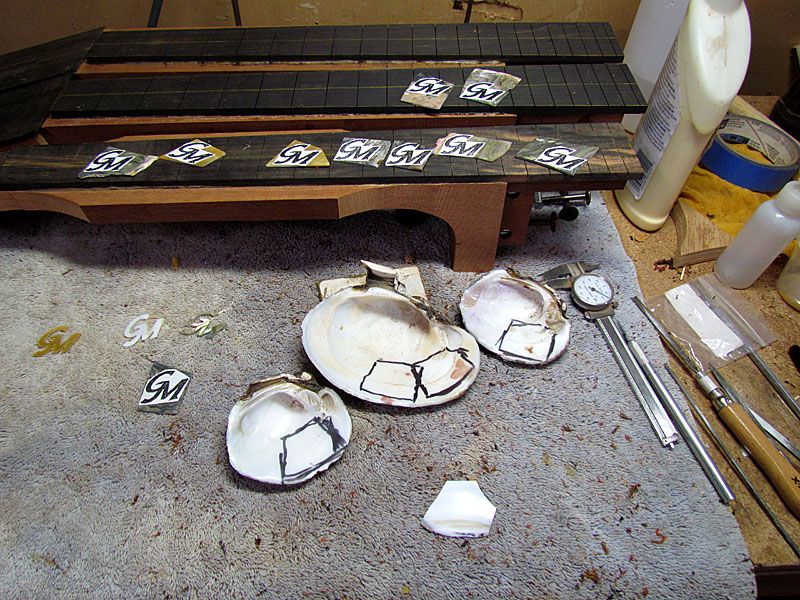
I tried cutting out a couple of the white pearl peghead logos, but most were some soft shell that I cut a bunch of years ago and were a bit crumbly. So I made a few more white pearl blanks. I make my own from freshwater mussel (clam) shells. Most of the shells around here are way too thin, but I have some from a friend in the Twin Cities that are a bit thicker.
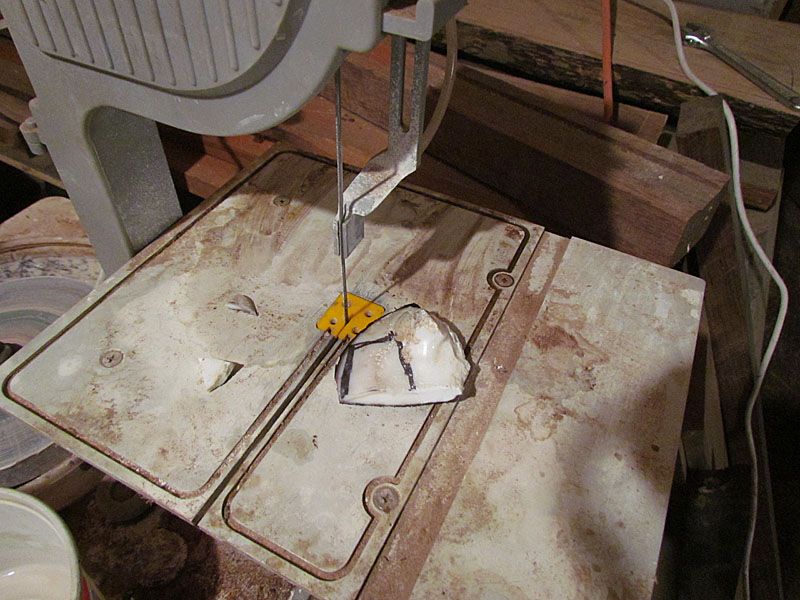
I use a little diamond bandsaw (made for stained glass) for cutting the shells into blanks
Then I use my home made wet grinder to grind the face flat
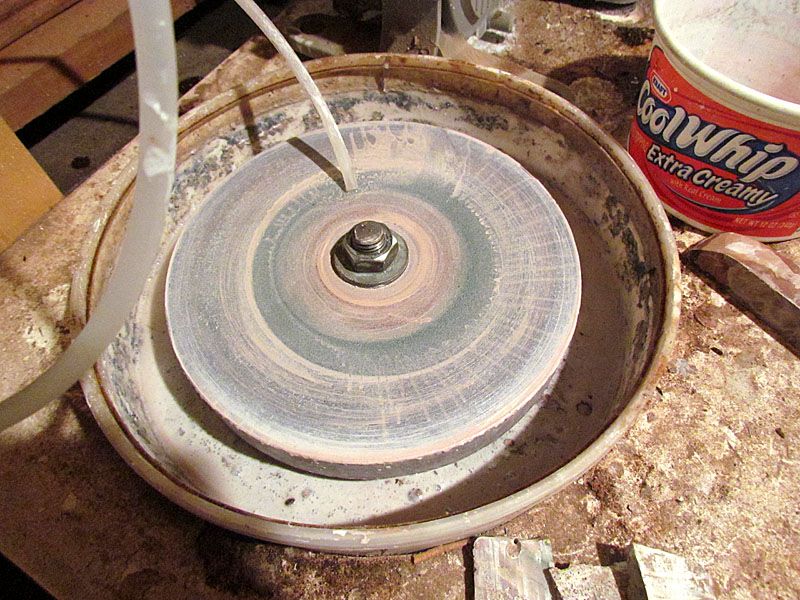
Most of these shells are not thick enough for more than one blank, so I just grind the back down until I have the right thickness
Here is a finished blank with more marked out on shells
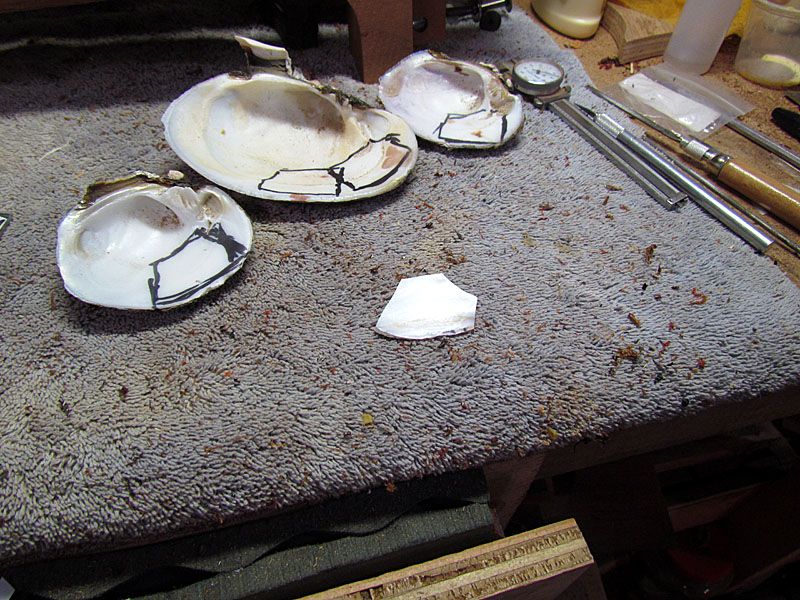
And with more cut out logos and blanks with patterns
This is all of the shell supply that I have left...
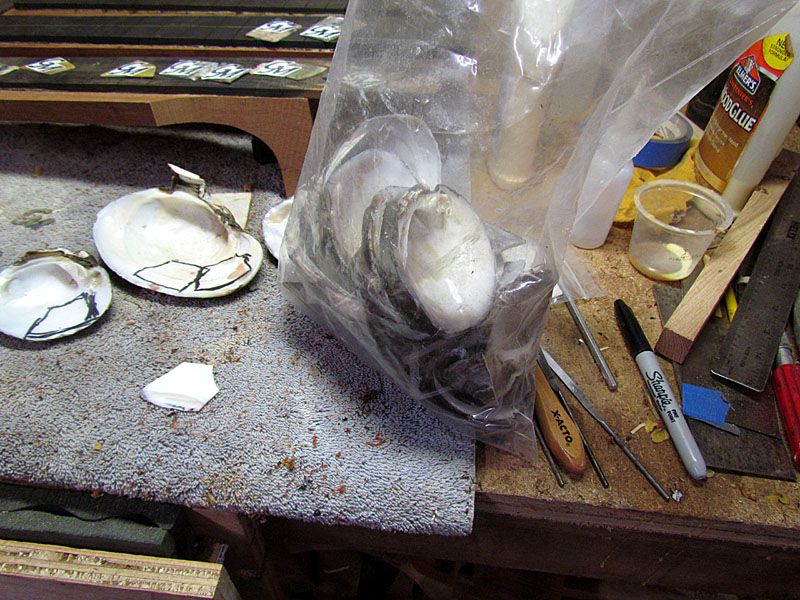
So if anybody wants to send up some shells, I will be thankful

G
I tried cutting out a couple of the white pearl peghead logos, but most were some soft shell that I cut a bunch of years ago and were a bit crumbly. So I made a few more white pearl blanks. I make my own from freshwater mussel (clam) shells. Most of the shells around here are way too thin, but I have some from a friend in the Twin Cities that are a bit thicker.
I use a little diamond bandsaw (made for stained glass) for cutting the shells into blanks

Then I use my home made wet grinder to grind the face flat

Most of these shells are not thick enough for more than one blank, so I just grind the back down until I have the right thickness
Here is a finished blank with more marked out on shells

And with more cut out logos and blanks with patterns

This is all of the shell supply that I have left...

So if anybody wants to send up some shells, I will be thankful
G
 Re: My Winter building plans
Grant, beautiful side sets, I nearly had a psychedelic flashback. It is truly a pleasure to see backs and sides in a range of color, once I hone my chops I may venture into some of that exotic stuff. I embrace your ambition for the winter builds. Taking to heart something Dennis posted not too long ago about creating "build threads" and not just posting finished instruments I hereby vow to create such threads of my winter builds. I have 2 commissions; a 00 and a small jumbo, for fun I will be doing a collaborative carve top 5 string electric bass, my first classical based on a Frederic plan, and an experimental 16" jazzer. And by the way, a happy holiday season to all. T
