"Snapper" Archtop
Re: "Snapper" Archtop
I'm loving the mallet! (as well as the build of course!)
Re: "Snapper" Archtop
Yea, the mallet! Grant must have a whole back forty full of em!
Mike
Mike
- whitespruce
- Site Admin
- Posts: 4367
- Joined: Thu Aug 21, 2008 6:53 am
- Include Off Topic: Yes
- Location: Northern Minnesota, USA
Re: "Snapper" Archtop
Ah yes, the mallet. Those who are unfamiliar with a woodcarver's mallet may have expected something more resembling a "hammer head" sort of thing. Woodcarving mallets are cylindrical in shape with the handle coming out of the end. That way one never need be concerned about bad orientation giving a glancing blow to the end of the chisel handle. Some are more "fancy" than others. I have seen brass headed ones and I have an aluminum headed one with a walnut handle. Problem with the metal headed ones is that they tend to chew up the chisel handles. There are nice lathe turned wooden ones, but it is just as simple to make something up out of a chunk of any round wood. The idea is that they will wear out rather than the end of the chisel handle. This one is just a piece of ironwood, which has a decent heft for its size, with a "handle" roughed out on the bandsaw and smoothed a bit to function comfortably....quick, cheap, and eventually disposable (into the fireplace).
So now I am progressing into the more detailed shaping, working out the more detailed forms of the individual plates or scales that make up the structure of the shell. If you were to Google for images of snapping turtles, you would see a myriad of shapes, some more rounded, some more angular, etc. And male shells are quite differently shaped than females shells, the latter being more dome shaped (to accommodate eggs inside). The shell I am using as a reference is a male shell, partly because it is the largest shell I have, but mostly because the more flattened top center will make an easier to play instrument.
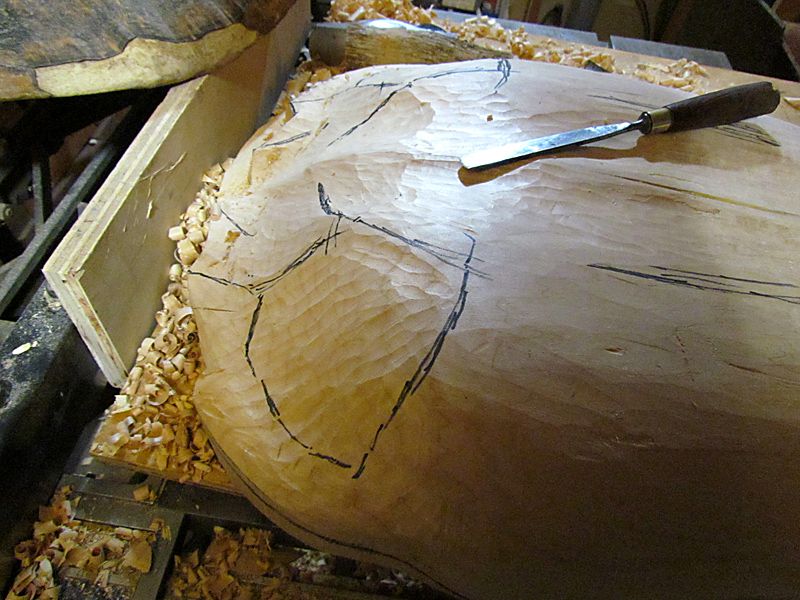
I have started at the rear of the shell, sketching on a few of the plates and then roughing out the contours.

Here you can see some of the more angular shapes starting to emerge

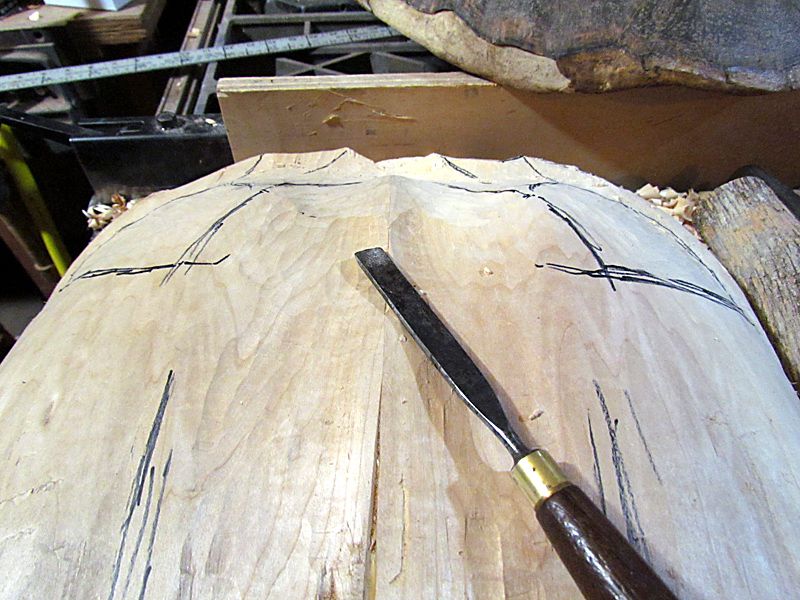
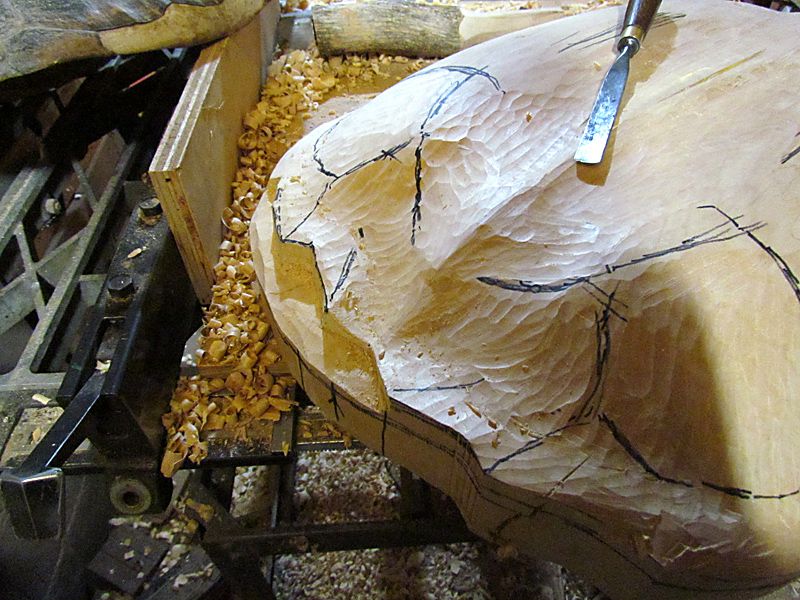
Another view to see the shapes better

As you can see, I have defined the outline of the rear of the shell. The wood at the lower left will be carved into the tail which is wrapping around the side of the turtle body
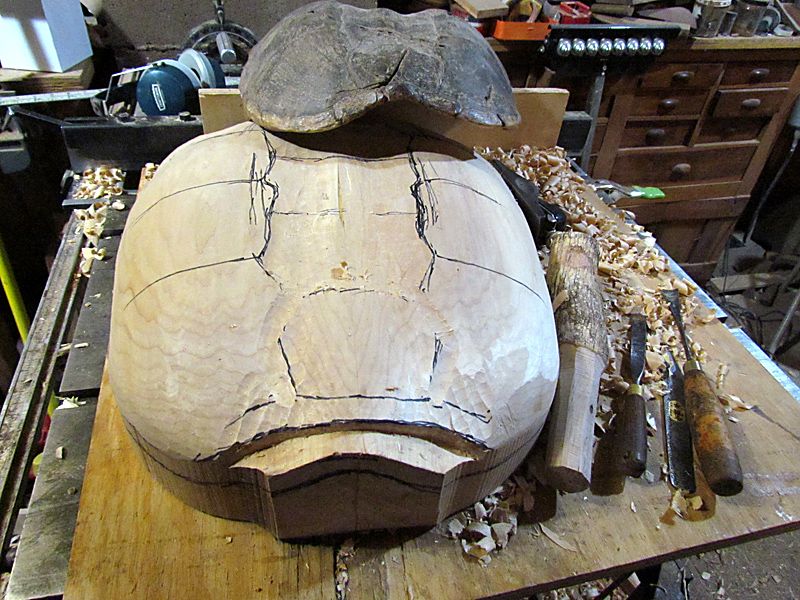
Now, I am moving to the front edge

I have outlined the front shell edge. You can see by looking at the real shell that I have quite a bit of wood to remove to get the proper detail shape.
Once the front edge is roughly shaped, I will work on the center portions. Then I will make further refinements to tie everything together. Since actual shells do vary quite a bit, I will probably use a bit of "artistic license" to maximize the comfort fit of the shape as an instrument.
Thanks for looking.
G
So now I am progressing into the more detailed shaping, working out the more detailed forms of the individual plates or scales that make up the structure of the shell. If you were to Google for images of snapping turtles, you would see a myriad of shapes, some more rounded, some more angular, etc. And male shells are quite differently shaped than females shells, the latter being more dome shaped (to accommodate eggs inside). The shell I am using as a reference is a male shell, partly because it is the largest shell I have, but mostly because the more flattened top center will make an easier to play instrument.
I have started at the rear of the shell, sketching on a few of the plates and then roughing out the contours.

Here you can see some of the more angular shapes starting to emerge

Another view to see the shapes better

As you can see, I have defined the outline of the rear of the shell. The wood at the lower left will be carved into the tail which is wrapping around the side of the turtle body
Now, I am moving to the front edge

I have outlined the front shell edge. You can see by looking at the real shell that I have quite a bit of wood to remove to get the proper detail shape.
Once the front edge is roughly shaped, I will work on the center portions. Then I will make further refinements to tie everything together. Since actual shells do vary quite a bit, I will probably use a bit of "artistic license" to maximize the comfort fit of the shape as an instrument.
Thanks for looking.
G
- George
- Posts: 336
- Joined: Sat Aug 23, 2008 7:29 pm
- Include Off Topic: Yes
- Location: Creal Springs, Illinois
Re: "Snapper" Archtop
Amazing work Grant. That will end up in a museum someday.
- Dennis Leahy
- Dishwasher
- Posts: 7082
- Joined: Thu Aug 21, 2008 1:59 am
- Include Off Topic: Yes
- Location: looking for a place to live
- Joe Sustaire
- Moderator
- Posts: 2640
- Joined: Sat Aug 23, 2008 6:41 pm
- Include Off Topic: Yes
- Location: Talihina, Oklahoma
Re: "Snapper" Archtop
This is an amazing project Grant!
And looking good, as expected.
And looking good, as expected.
"I tell you we are here on earth to fart around, and don't let anyone tell you any different!"
Kurt Vonnegut
Kurt Vonnegut
-
charangohabsburg
- Posts: 354
- Joined: Tue Oct 19, 2010 6:16 pm
- Include Off Topic: Yes
- Location: Switzerland
Re: "Snapper" Archtop
Very cool stuff Grant! After looking at that turtle half you have made earlier makes me think it would be a good idea you put a chain on this Snapper Archtop once it is finished, or it might walk away! 
I also like your power tool there (mallet, that is). How long does the bark on it last? Wish I had some similarly tough wood here around for making mallets. Beech and apple are about the best I can get.
I also like your power tool there (mallet, that is). How long does the bark on it last? Wish I had some similarly tough wood here around for making mallets. Beech and apple are about the best I can get.
- whitespruce
- Site Admin
- Posts: 4367
- Joined: Thu Aug 21, 2008 6:53 am
- Include Off Topic: Yes
- Location: Northern Minnesota, USA
Re: "Snapper" Archtop
Thanks for the comments, Markus. Guess I need to pull this one out of the closet, too, and get truckin'. Might be able to have it strung up in time for Stringfest.
G
G

