Re: Curly Maple Cutaway for Debbie
Posted: Fri Oct 03, 2008 12:26 pm
Bracing the Back and Top -
Ever wonder why it's not the back and front or top and bottom??? But I digress.
I didn't take any pictures of the process but the way I cut my braces out is to first split the billet along the grain line, then cut the braces to overwidth, run them through the drum sander to get them to width, draw the contour of the arch and cut on the bandsaw, then sand on the radius dish. Once I have the radius in the brace I mark it to length and height and cut it out on the bandsaw. I number each brace and draw an arrow pointing to the curved side.
For this guitar I used cedar braces on the back and spruce on the top. I like the contrast of the cedar on the maple.
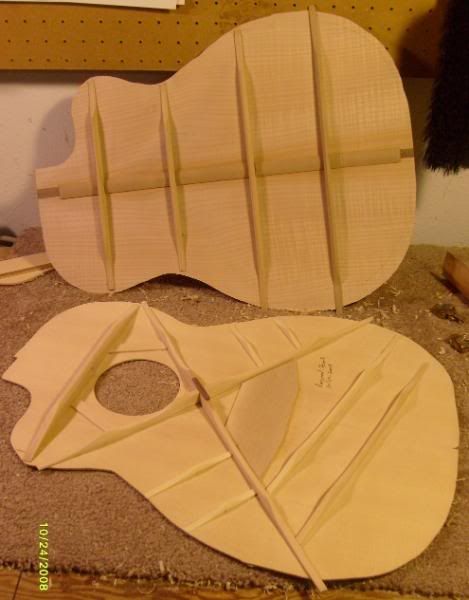
On the back I glue a single cross-grain strip the length of the back to cover the seam and then cut out the areas where the braces go. I find it easier to cut out the area where the brace goes than to line up several strips of back reinforcement and have them come out in a straight line. When I glue a top together I use the area above and/or below the outline to make my own reinforcement strips.
For the SG I use 4 braces but keep them all tall and thin. I also glue them in first and then profile them.
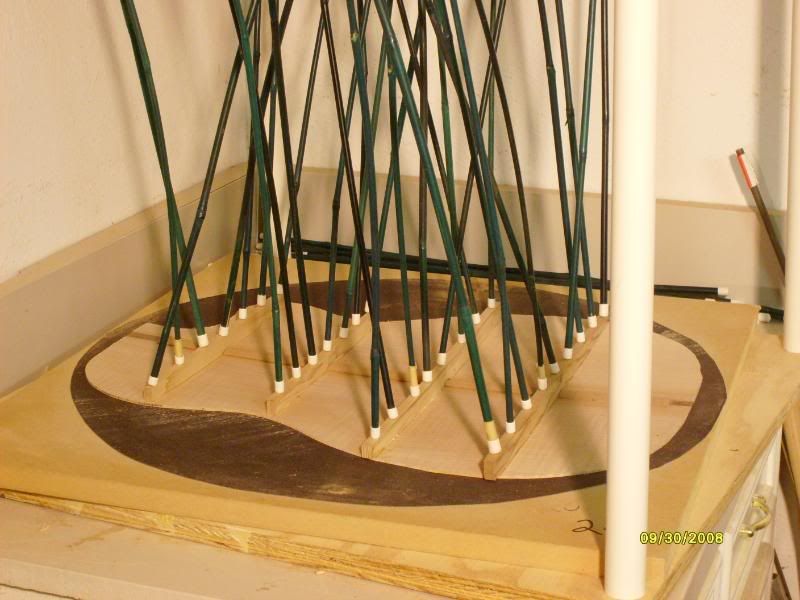
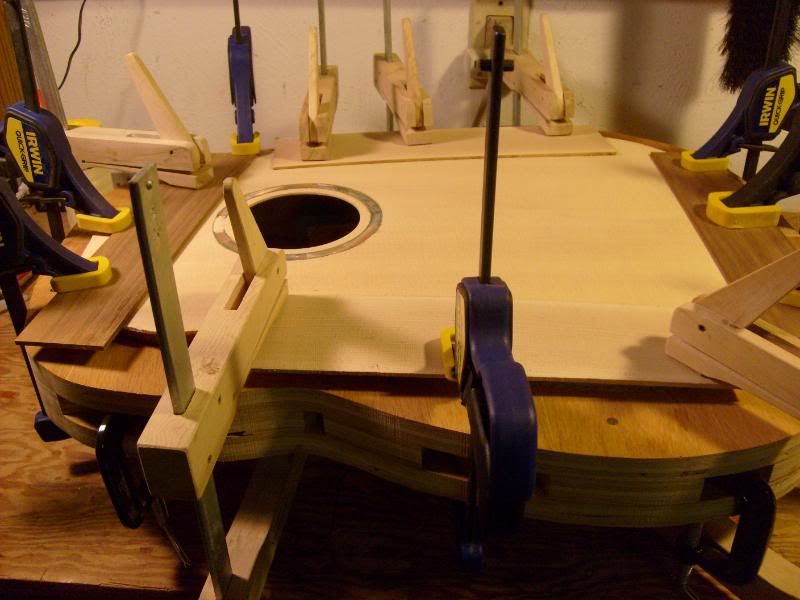
For the top I draw the brace positions onto the top itself, cut out a Hard Maple bridge plate, mark and cut-out the slots for the x-brace, and then I usually glue in 2 stages with the first stage being the x-brace and bridge plate and the second stage being all the rest of the braces. I wasn't done with the x-braces yet so I glued the bridgeplate on by itself and then followed with the x-brace. Felt it was harder to keep the bridgeplate from shifting and won't go that route again. Worked out, just not as easily. Here is the second stage with the x-brace.
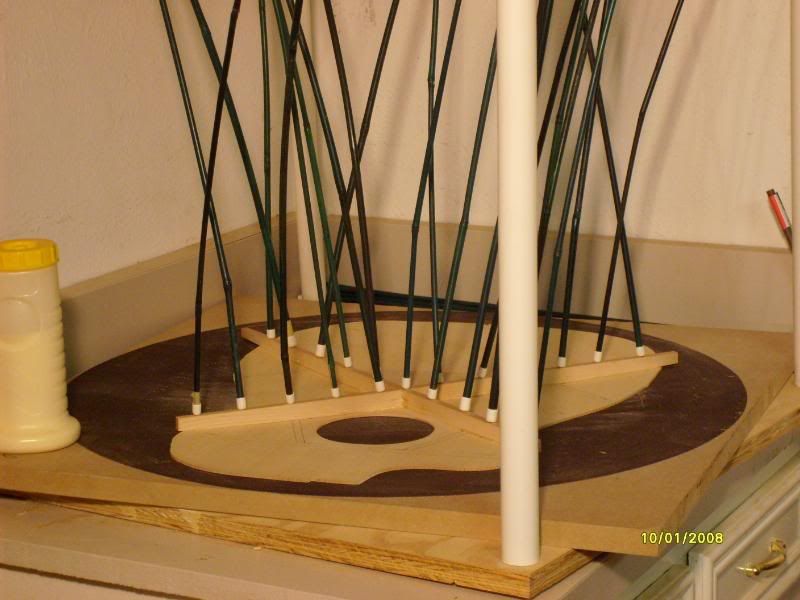
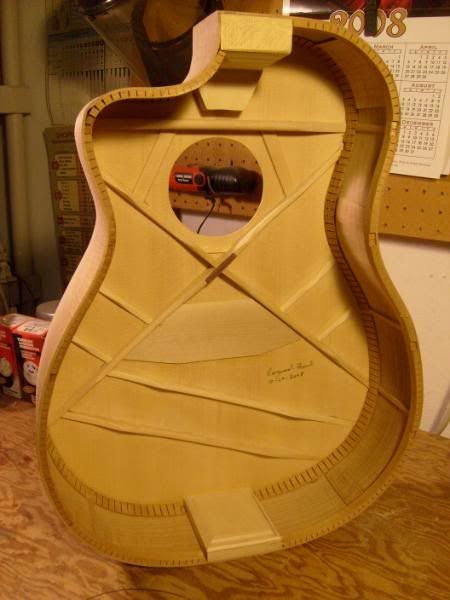
and the 3rd stage with all the rest (minus the braces around the soundhole)
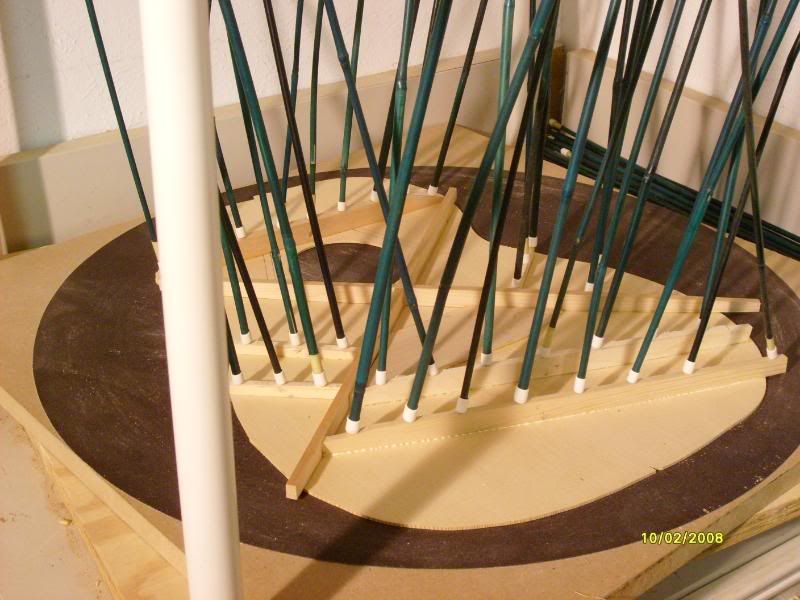
Next comes the profiling...
Raymond
Ever wonder why it's not the back and front or top and bottom???
I didn't take any pictures of the process but the way I cut my braces out is to first split the billet along the grain line, then cut the braces to overwidth, run them through the drum sander to get them to width, draw the contour of the arch and cut on the bandsaw, then sand on the radius dish. Once I have the radius in the brace I mark it to length and height and cut it out on the bandsaw. I number each brace and draw an arrow pointing to the curved side.
For this guitar I used cedar braces on the back and spruce on the top. I like the contrast of the cedar on the maple.
On the back I glue a single cross-grain strip the length of the back to cover the seam and then cut out the areas where the braces go. I find it easier to cut out the area where the brace goes than to line up several strips of back reinforcement and have them come out in a straight line. When I glue a top together I use the area above and/or below the outline to make my own reinforcement strips.
For the SG I use 4 braces but keep them all tall and thin. I also glue them in first and then profile them.

For the top I draw the brace positions onto the top itself, cut out a Hard Maple bridge plate, mark and cut-out the slots for the x-brace, and then I usually glue in 2 stages with the first stage being the x-brace and bridge plate and the second stage being all the rest of the braces. I wasn't done with the x-braces yet so I glued the bridgeplate on by itself and then followed with the x-brace. Felt it was harder to keep the bridgeplate from shifting and won't go that route again. Worked out, just not as easily. Here is the second stage with the x-brace.

and the 3rd stage with all the rest (minus the braces around the soundhole)

Next comes the profiling...
Raymond
